Configuring Microsoft OAuth for Wizlink®
To use Microsoft Authentification and log in to a Microsoft account with Wizlink, you need to complete the following steps:
- Create an internal (single tenant) application in Azure Active Directory
- Authorize access through the Admin panel
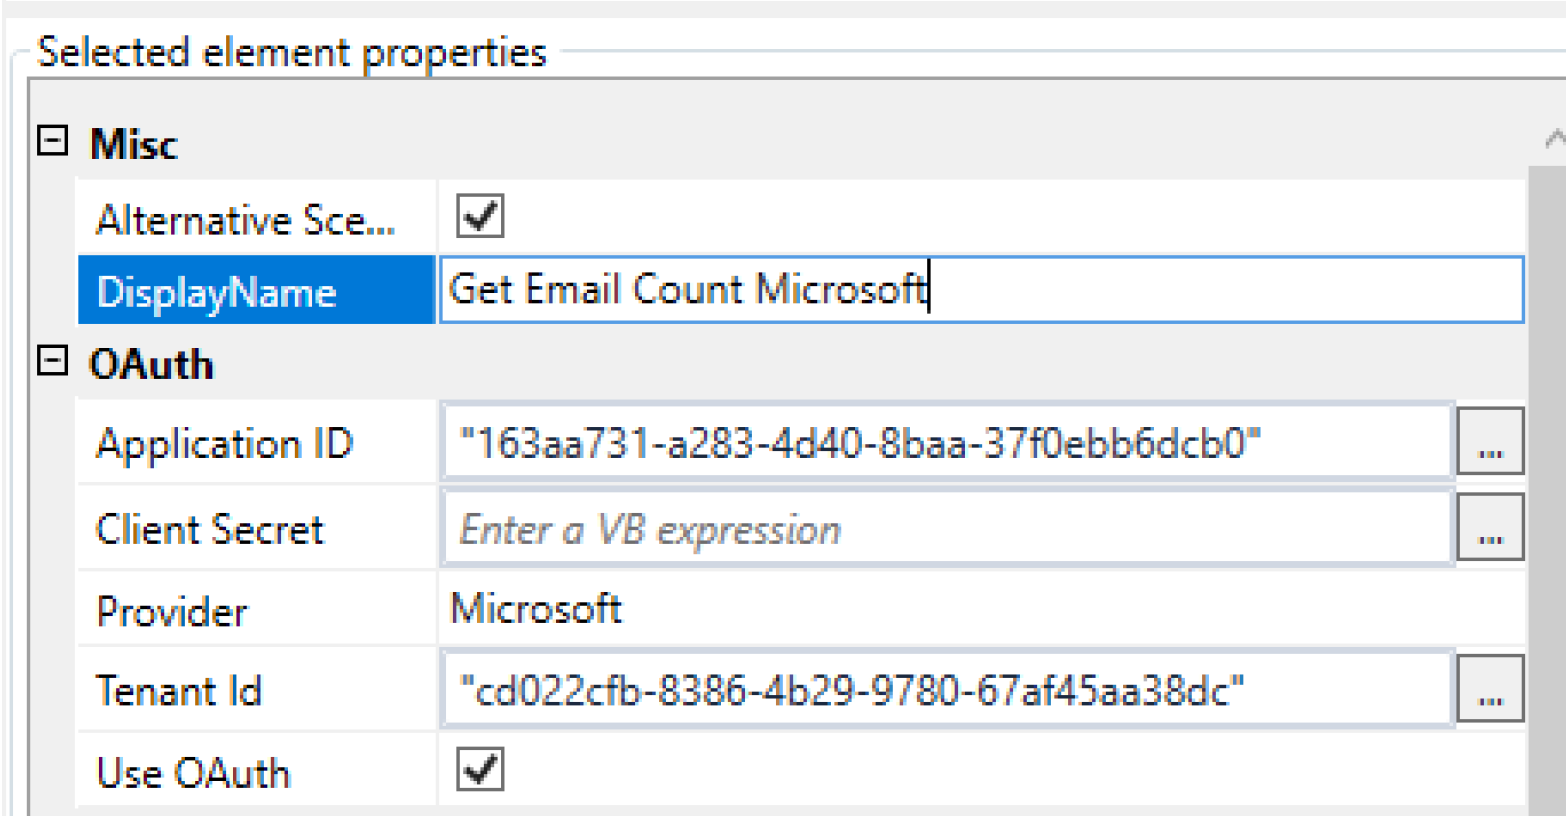
- Input Application and Tenant IDs in Wizlink's email Activity
1. Create an Azure Active Directory application
Log in to https://portal.azure.com/#home with an account in the same organization as target email and choose Azure Active Directory from the menu. Next choose App Registration.

Choose the New Registration option.
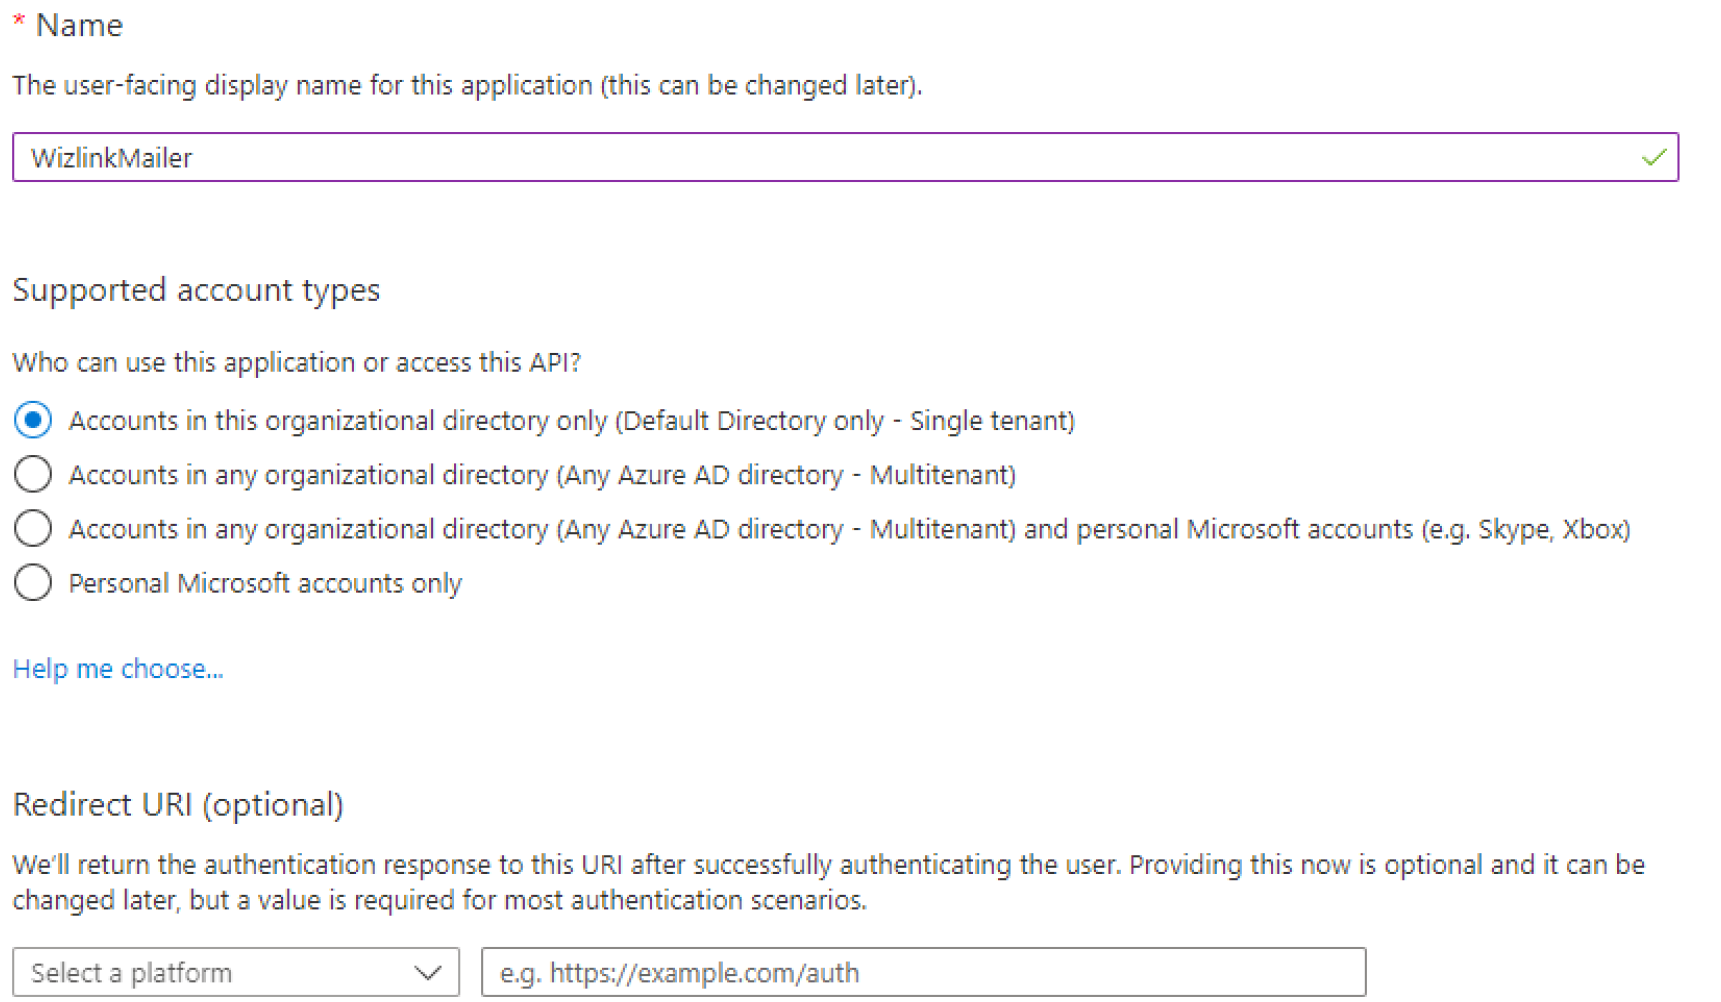
Fill in the name of your application, but leave the rest of the fields as default. Then click on Register.

If the site goes back to the main page, go back to Azure Active Directory -> App Registration. You should now see your new application on the list.
Click on application name to go to application management.
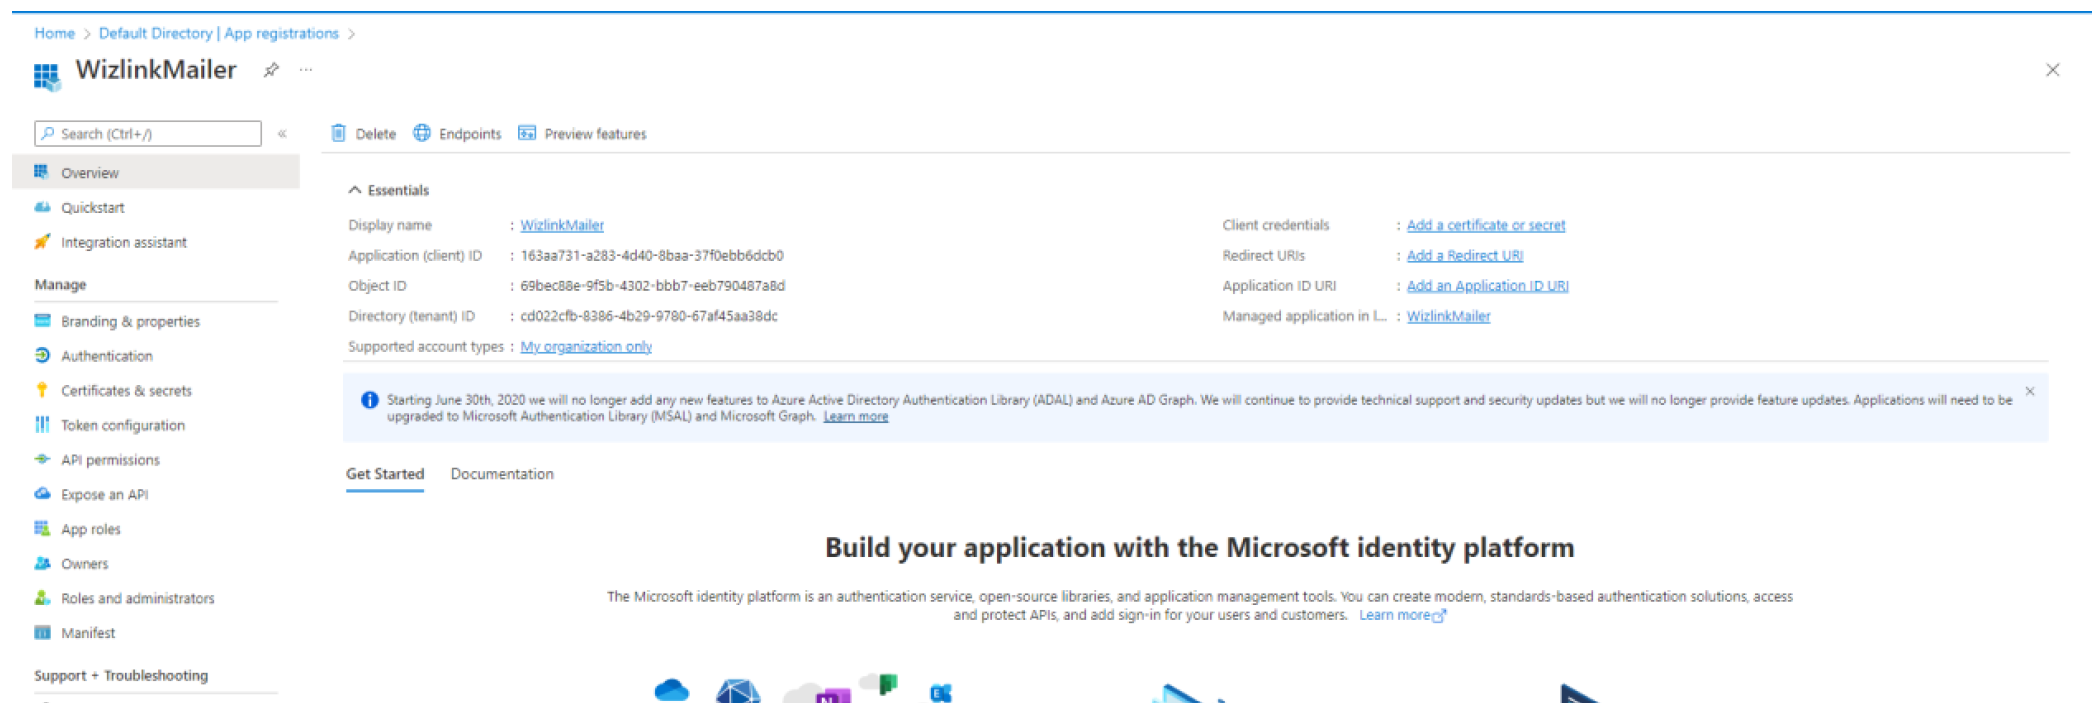
Here you will need to configure an authentication token, as well as configure a platform and devices.
To create an authentication token click on Certificates & secrets.
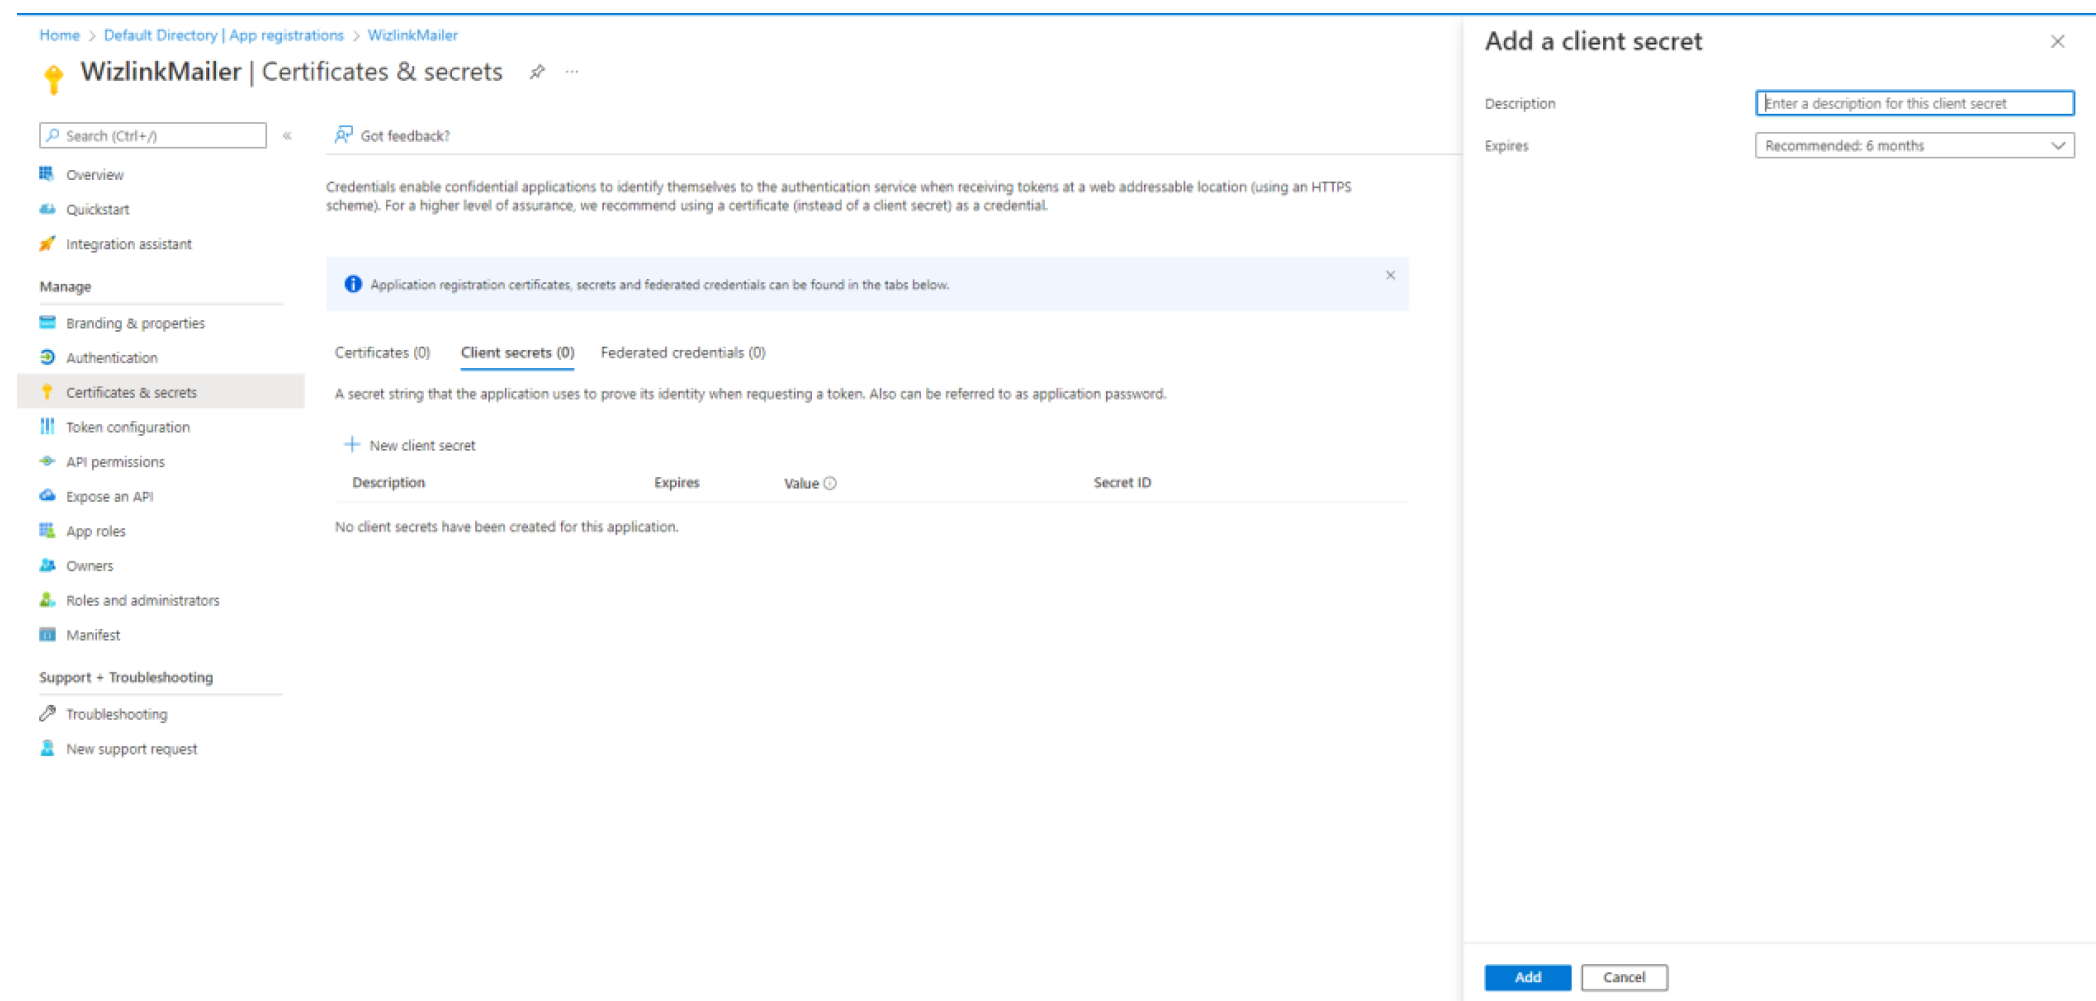
Choose New Client Secret. In new window on the right provide description and expiration time (how long until this step needs to be repeated in order to generate a new valid token). Confirm with Add.
Afterwards, go to Authentication tab and verify that the Allow public client flows option is on. Make sure the slider is set to Yes.
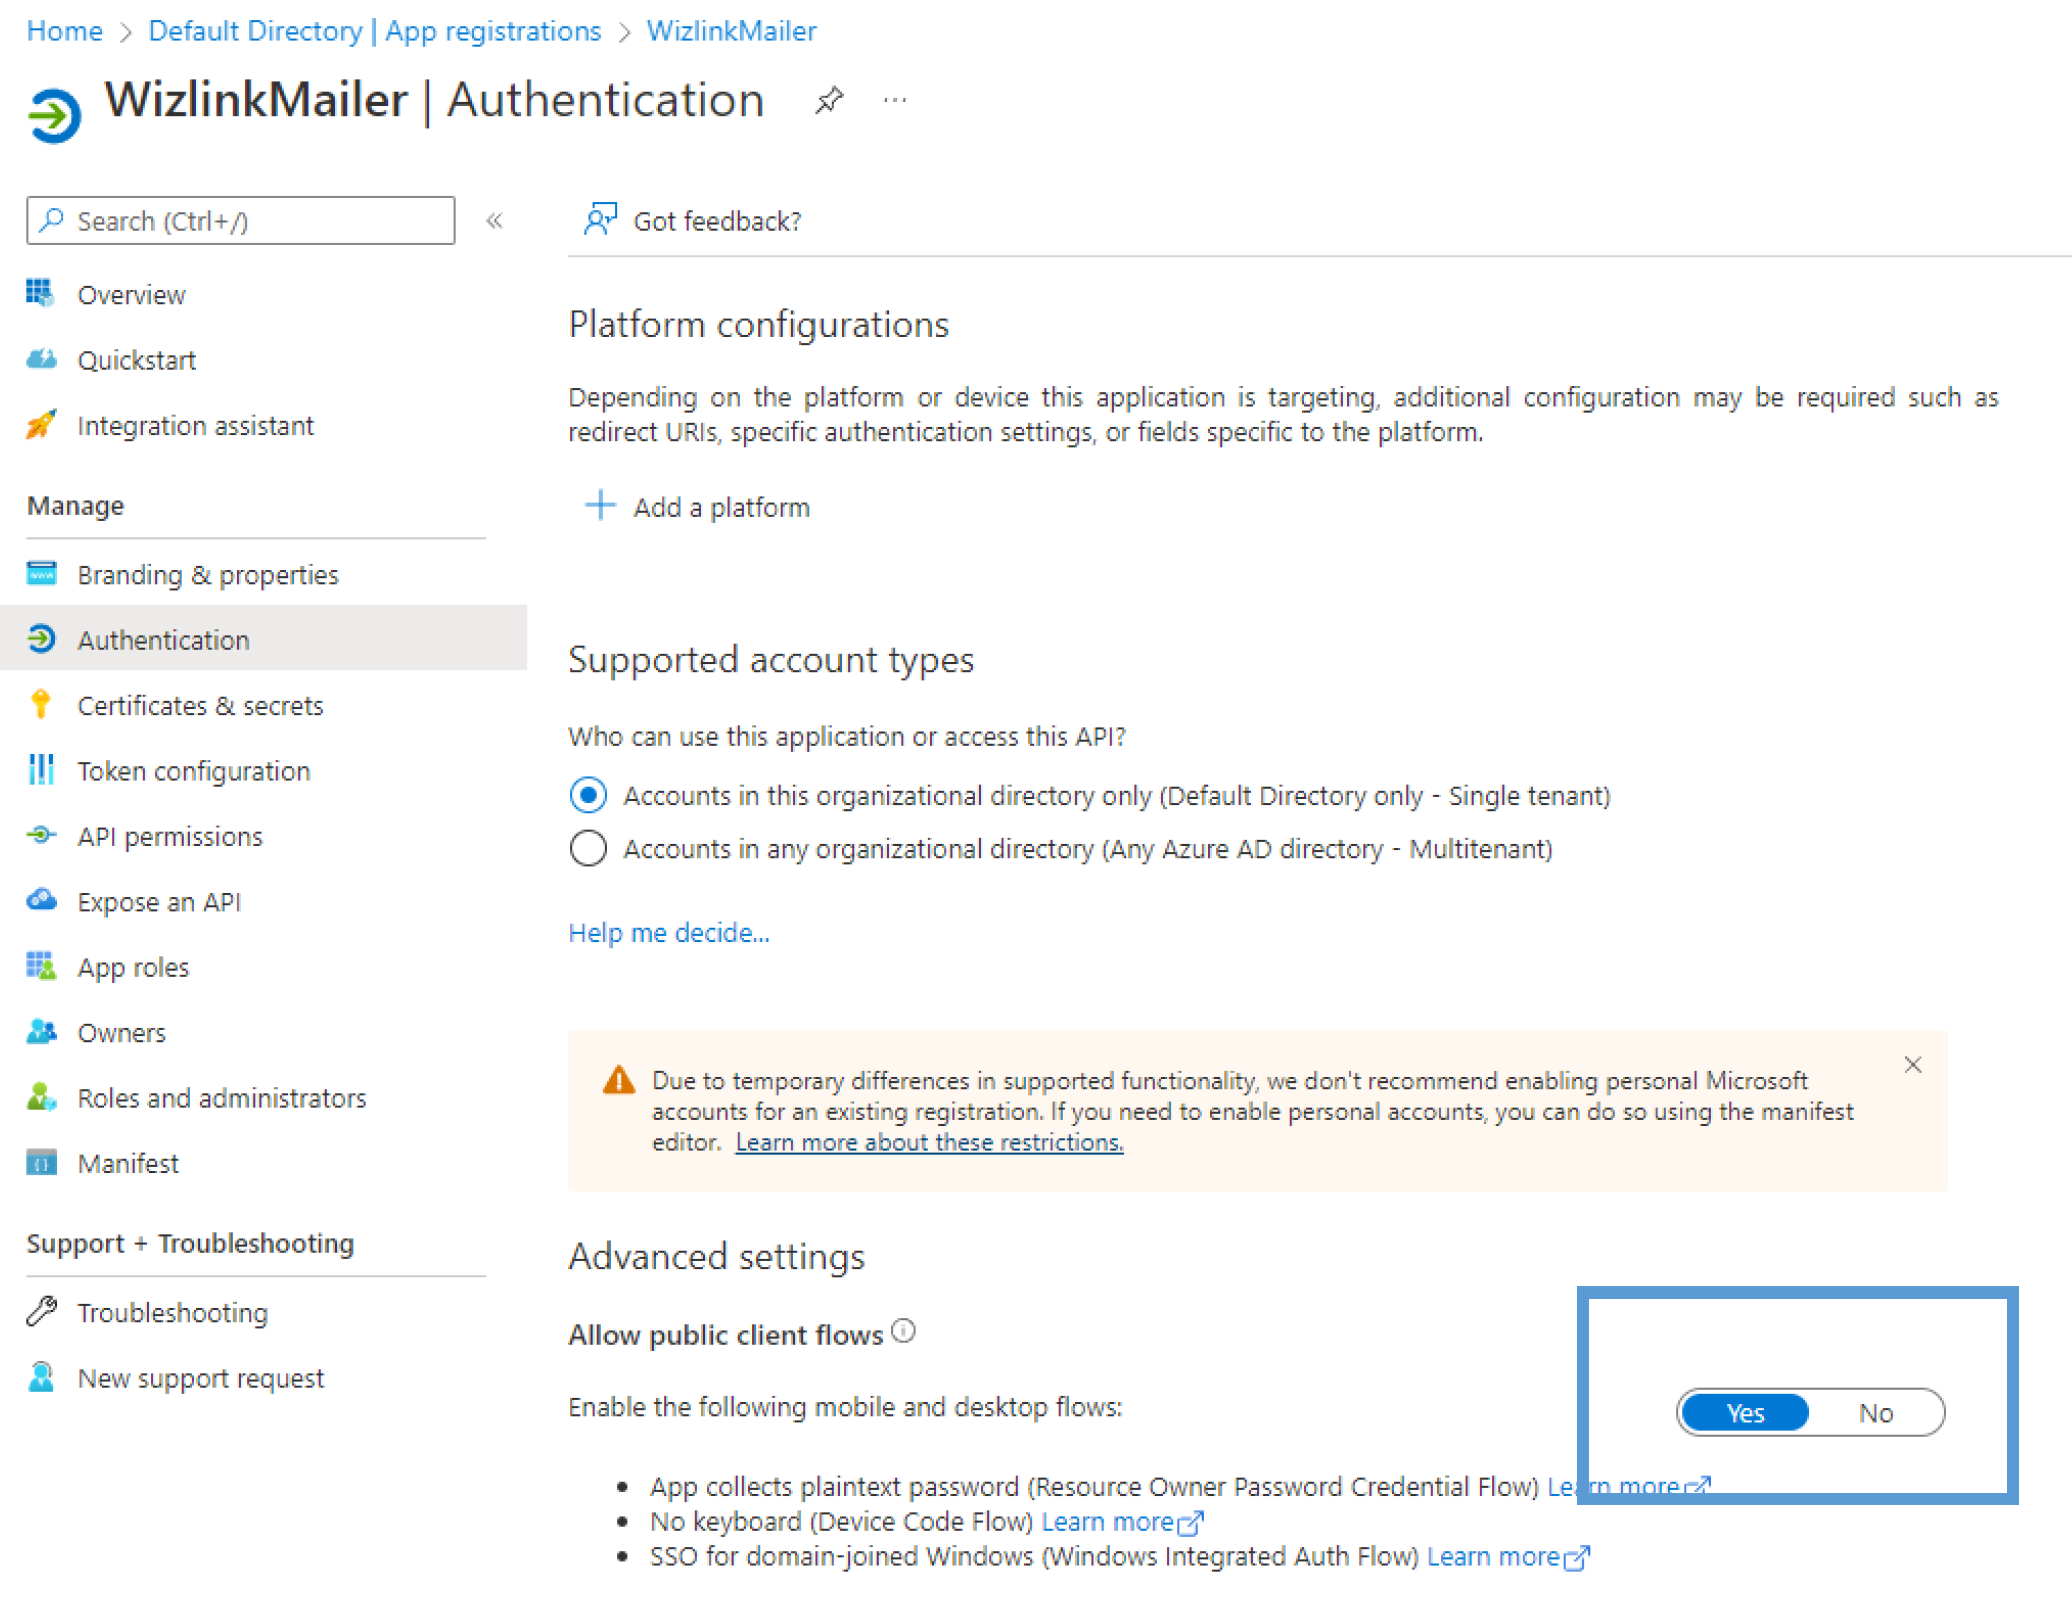
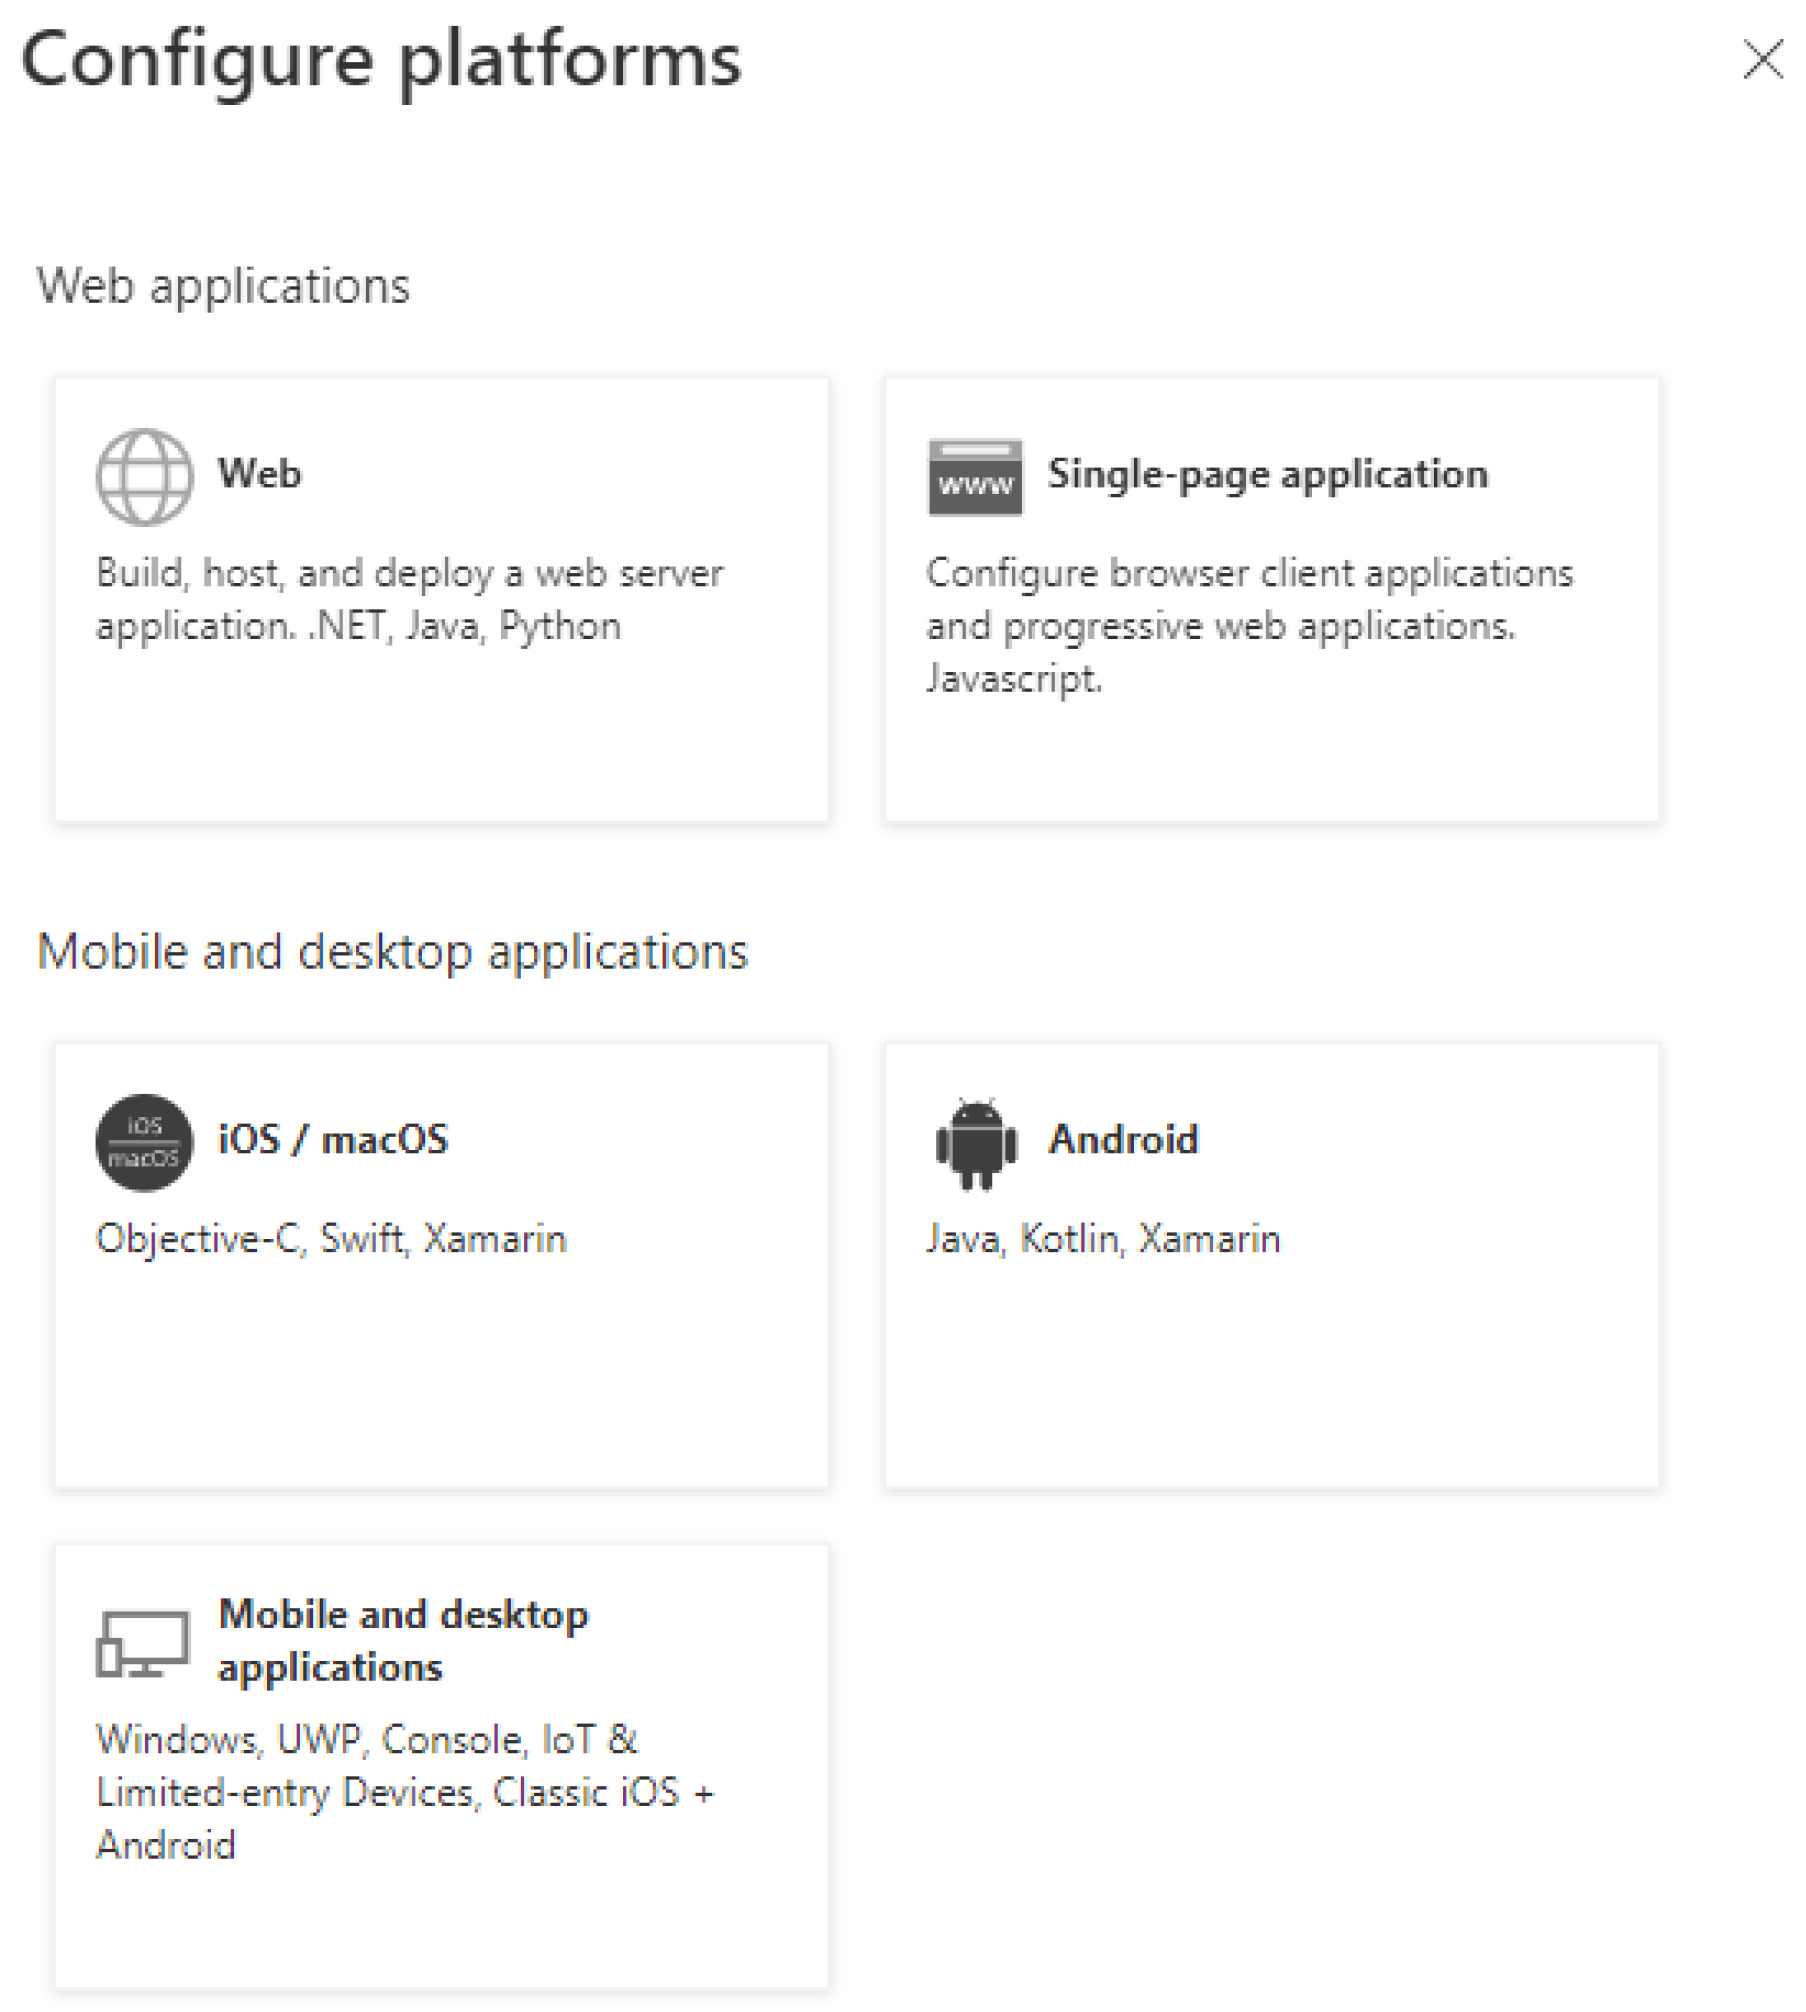
Under Platform configurations click on Add a platform. From the newly opened window pick Mobile and desktop applications.
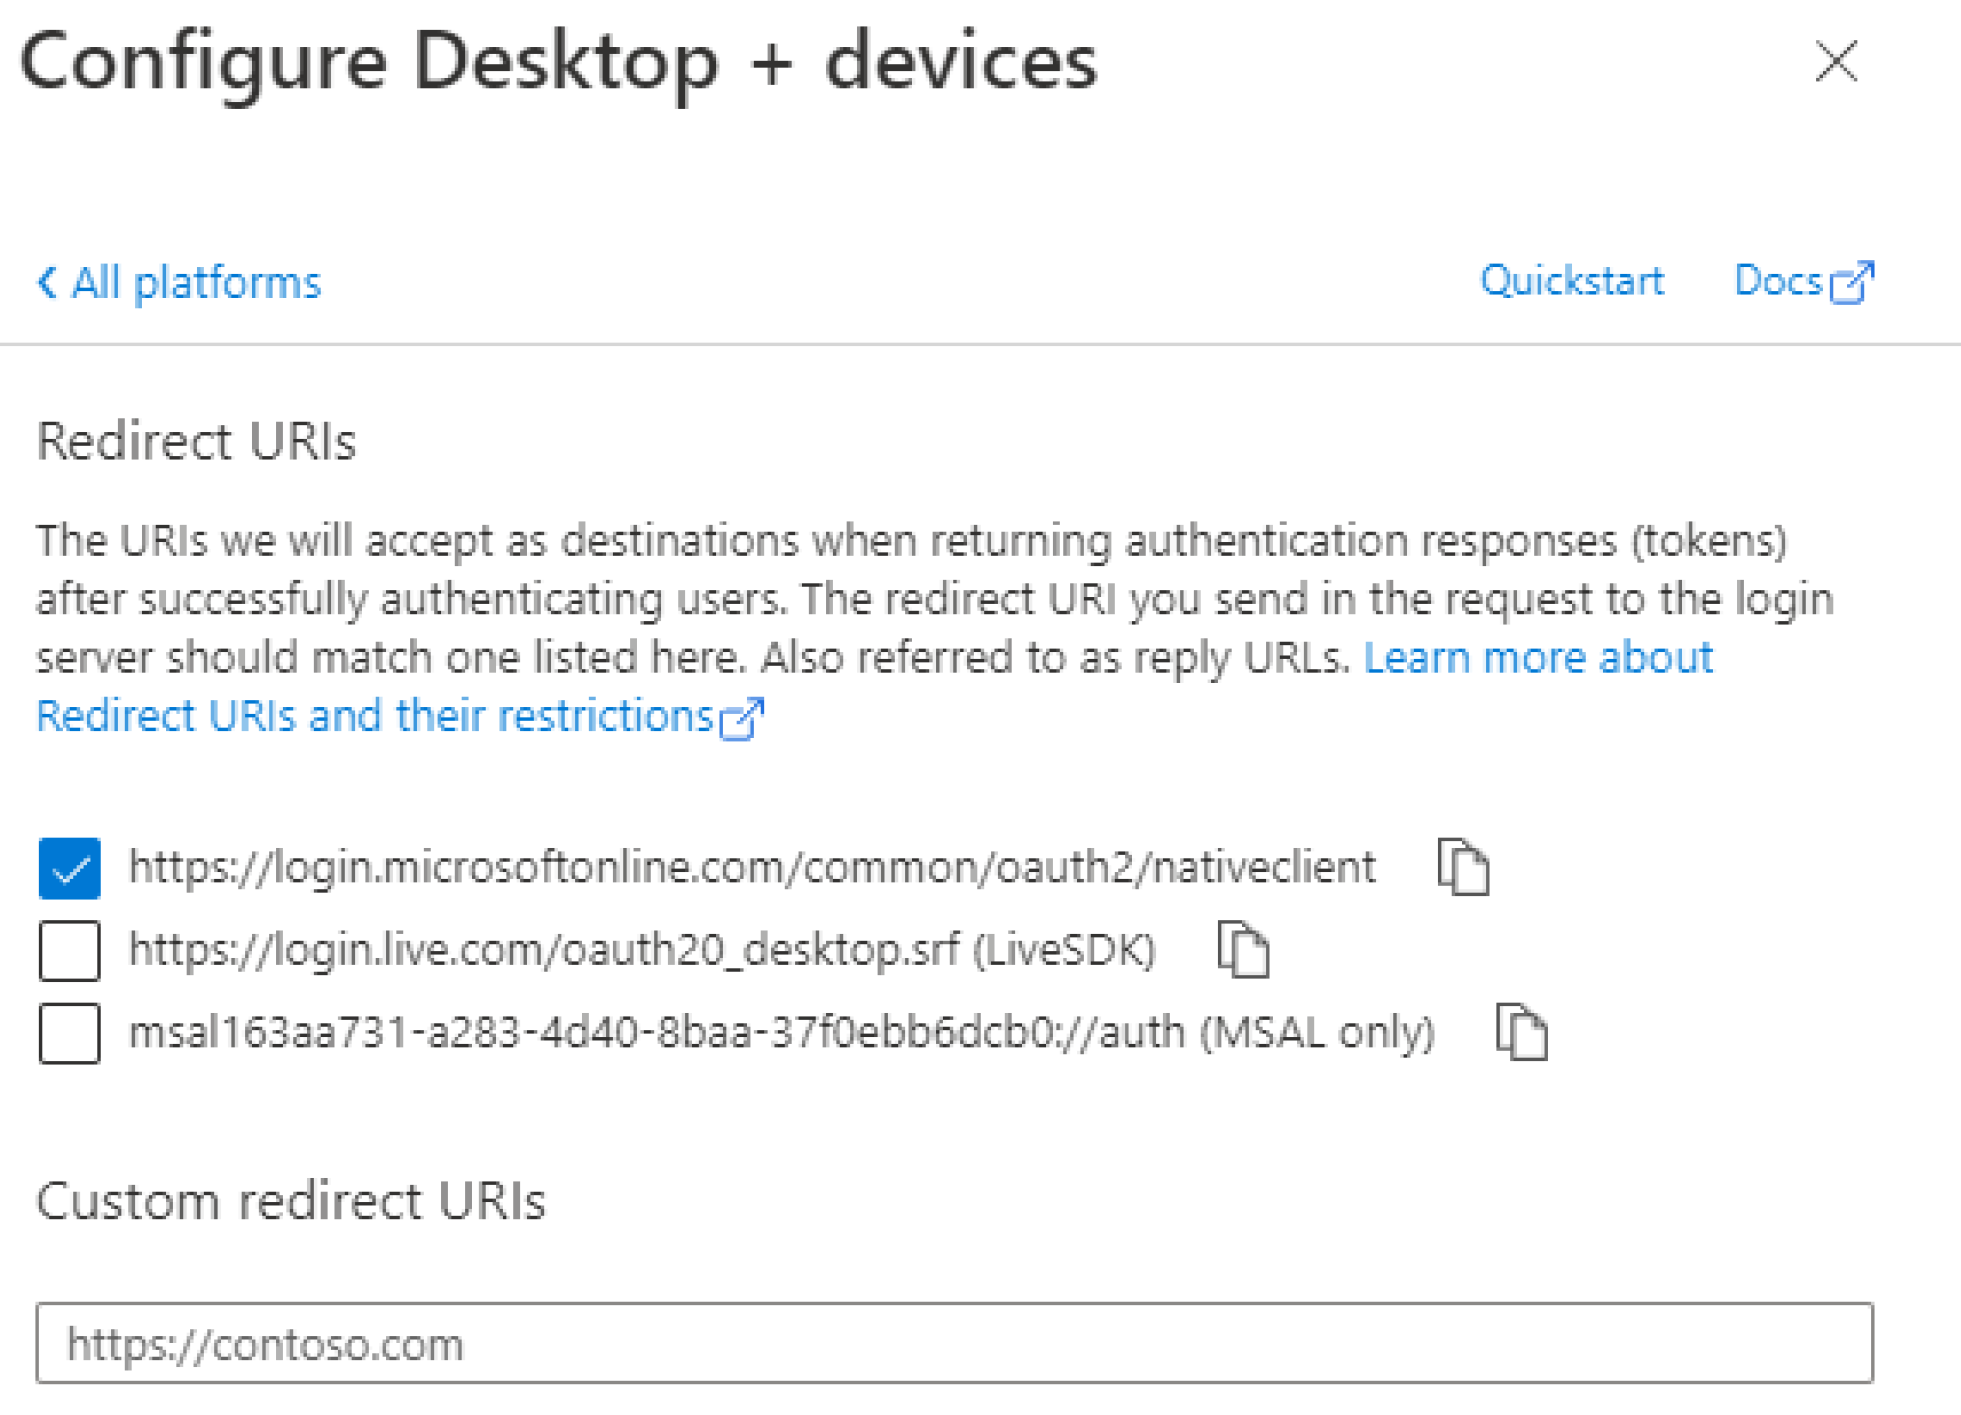
You will be prompted to pick a Redirect URI. Check the box next to https://login.microsoftonline.com/common/oauth2/nativeclient and confirm your choice with Configure.
At the end, go to the Overview tab in the left hand menu and copy values next to Application (client) and Directory (tenant) ID. You will need to fill in these values in Wizlink activity.

2. Authorize Access
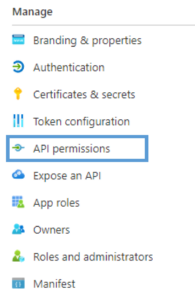
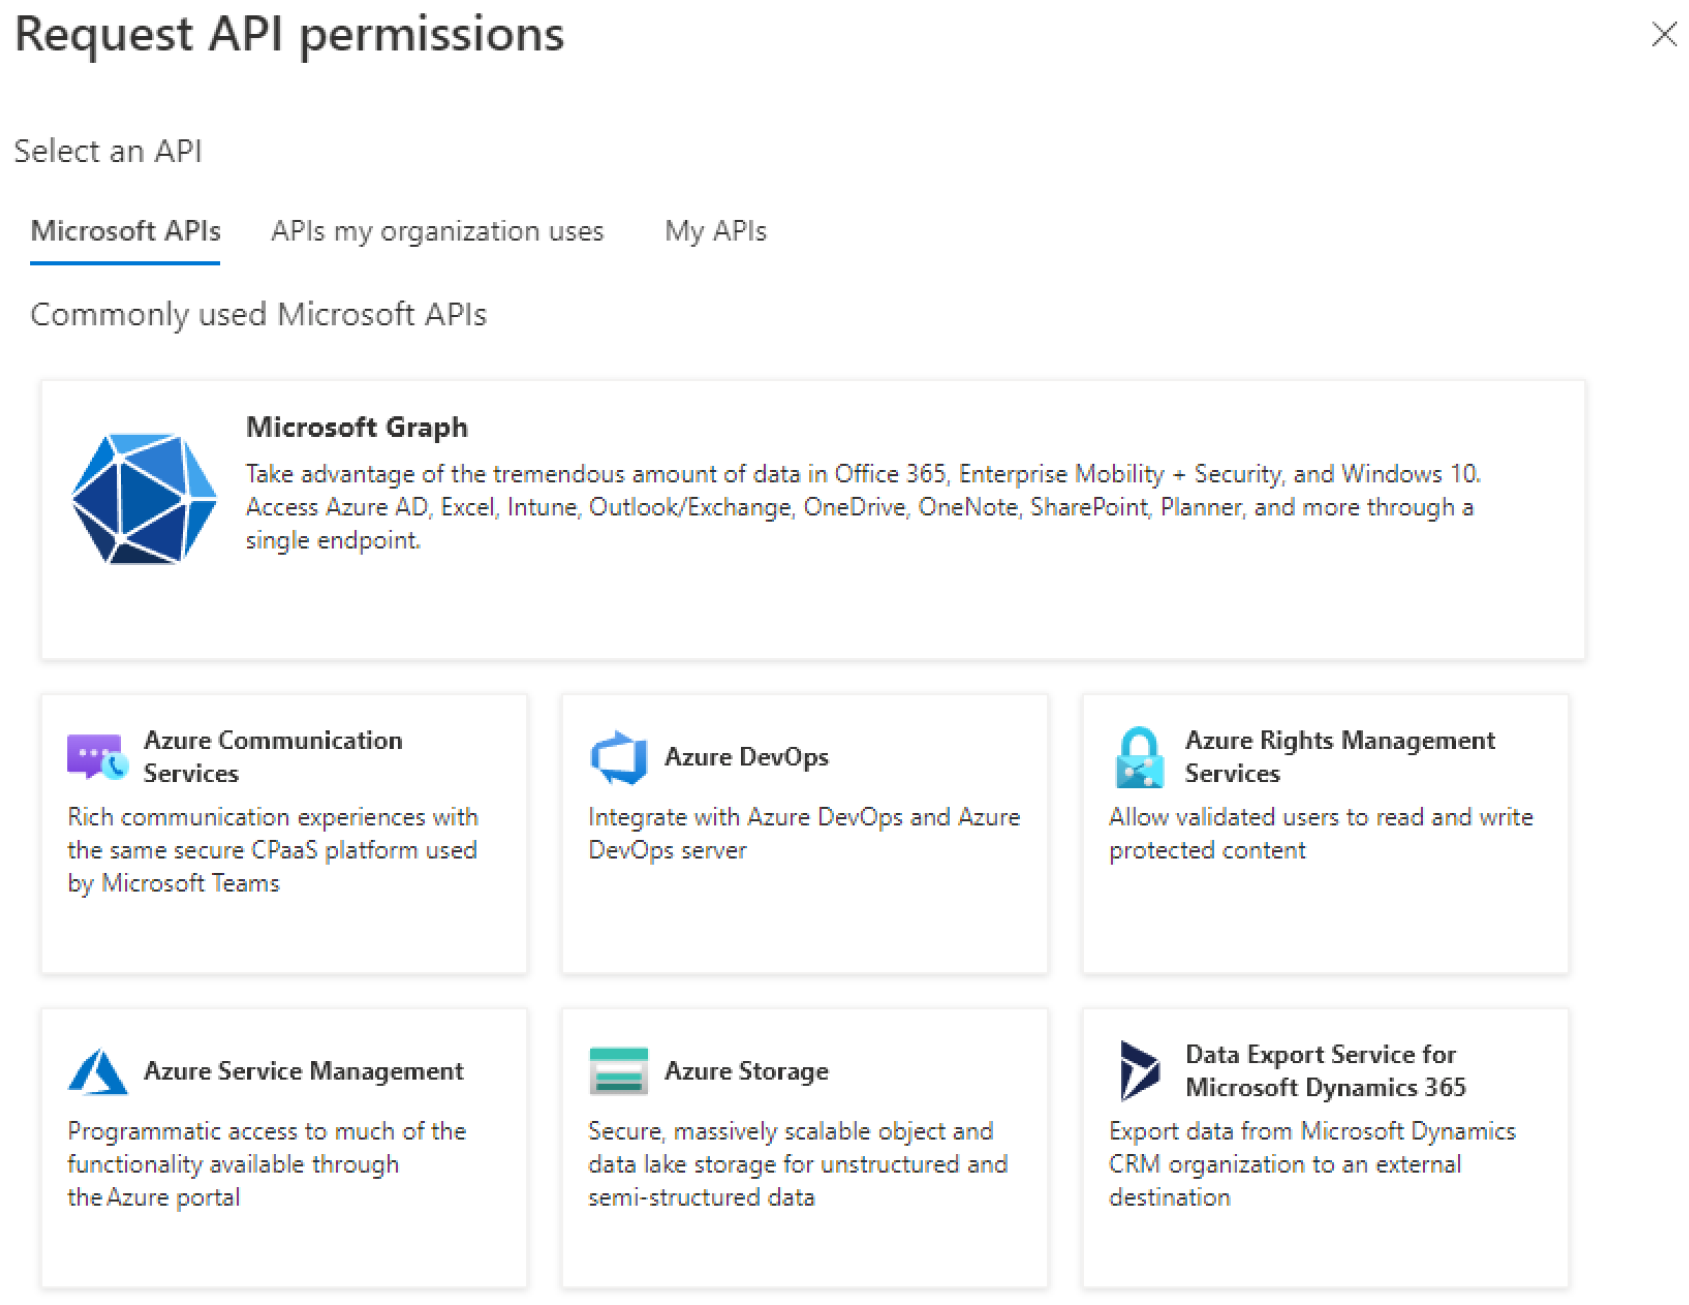
Click on the API permissions tab and click Add a permission. Out of the window on the right choose Microsoft Graph.
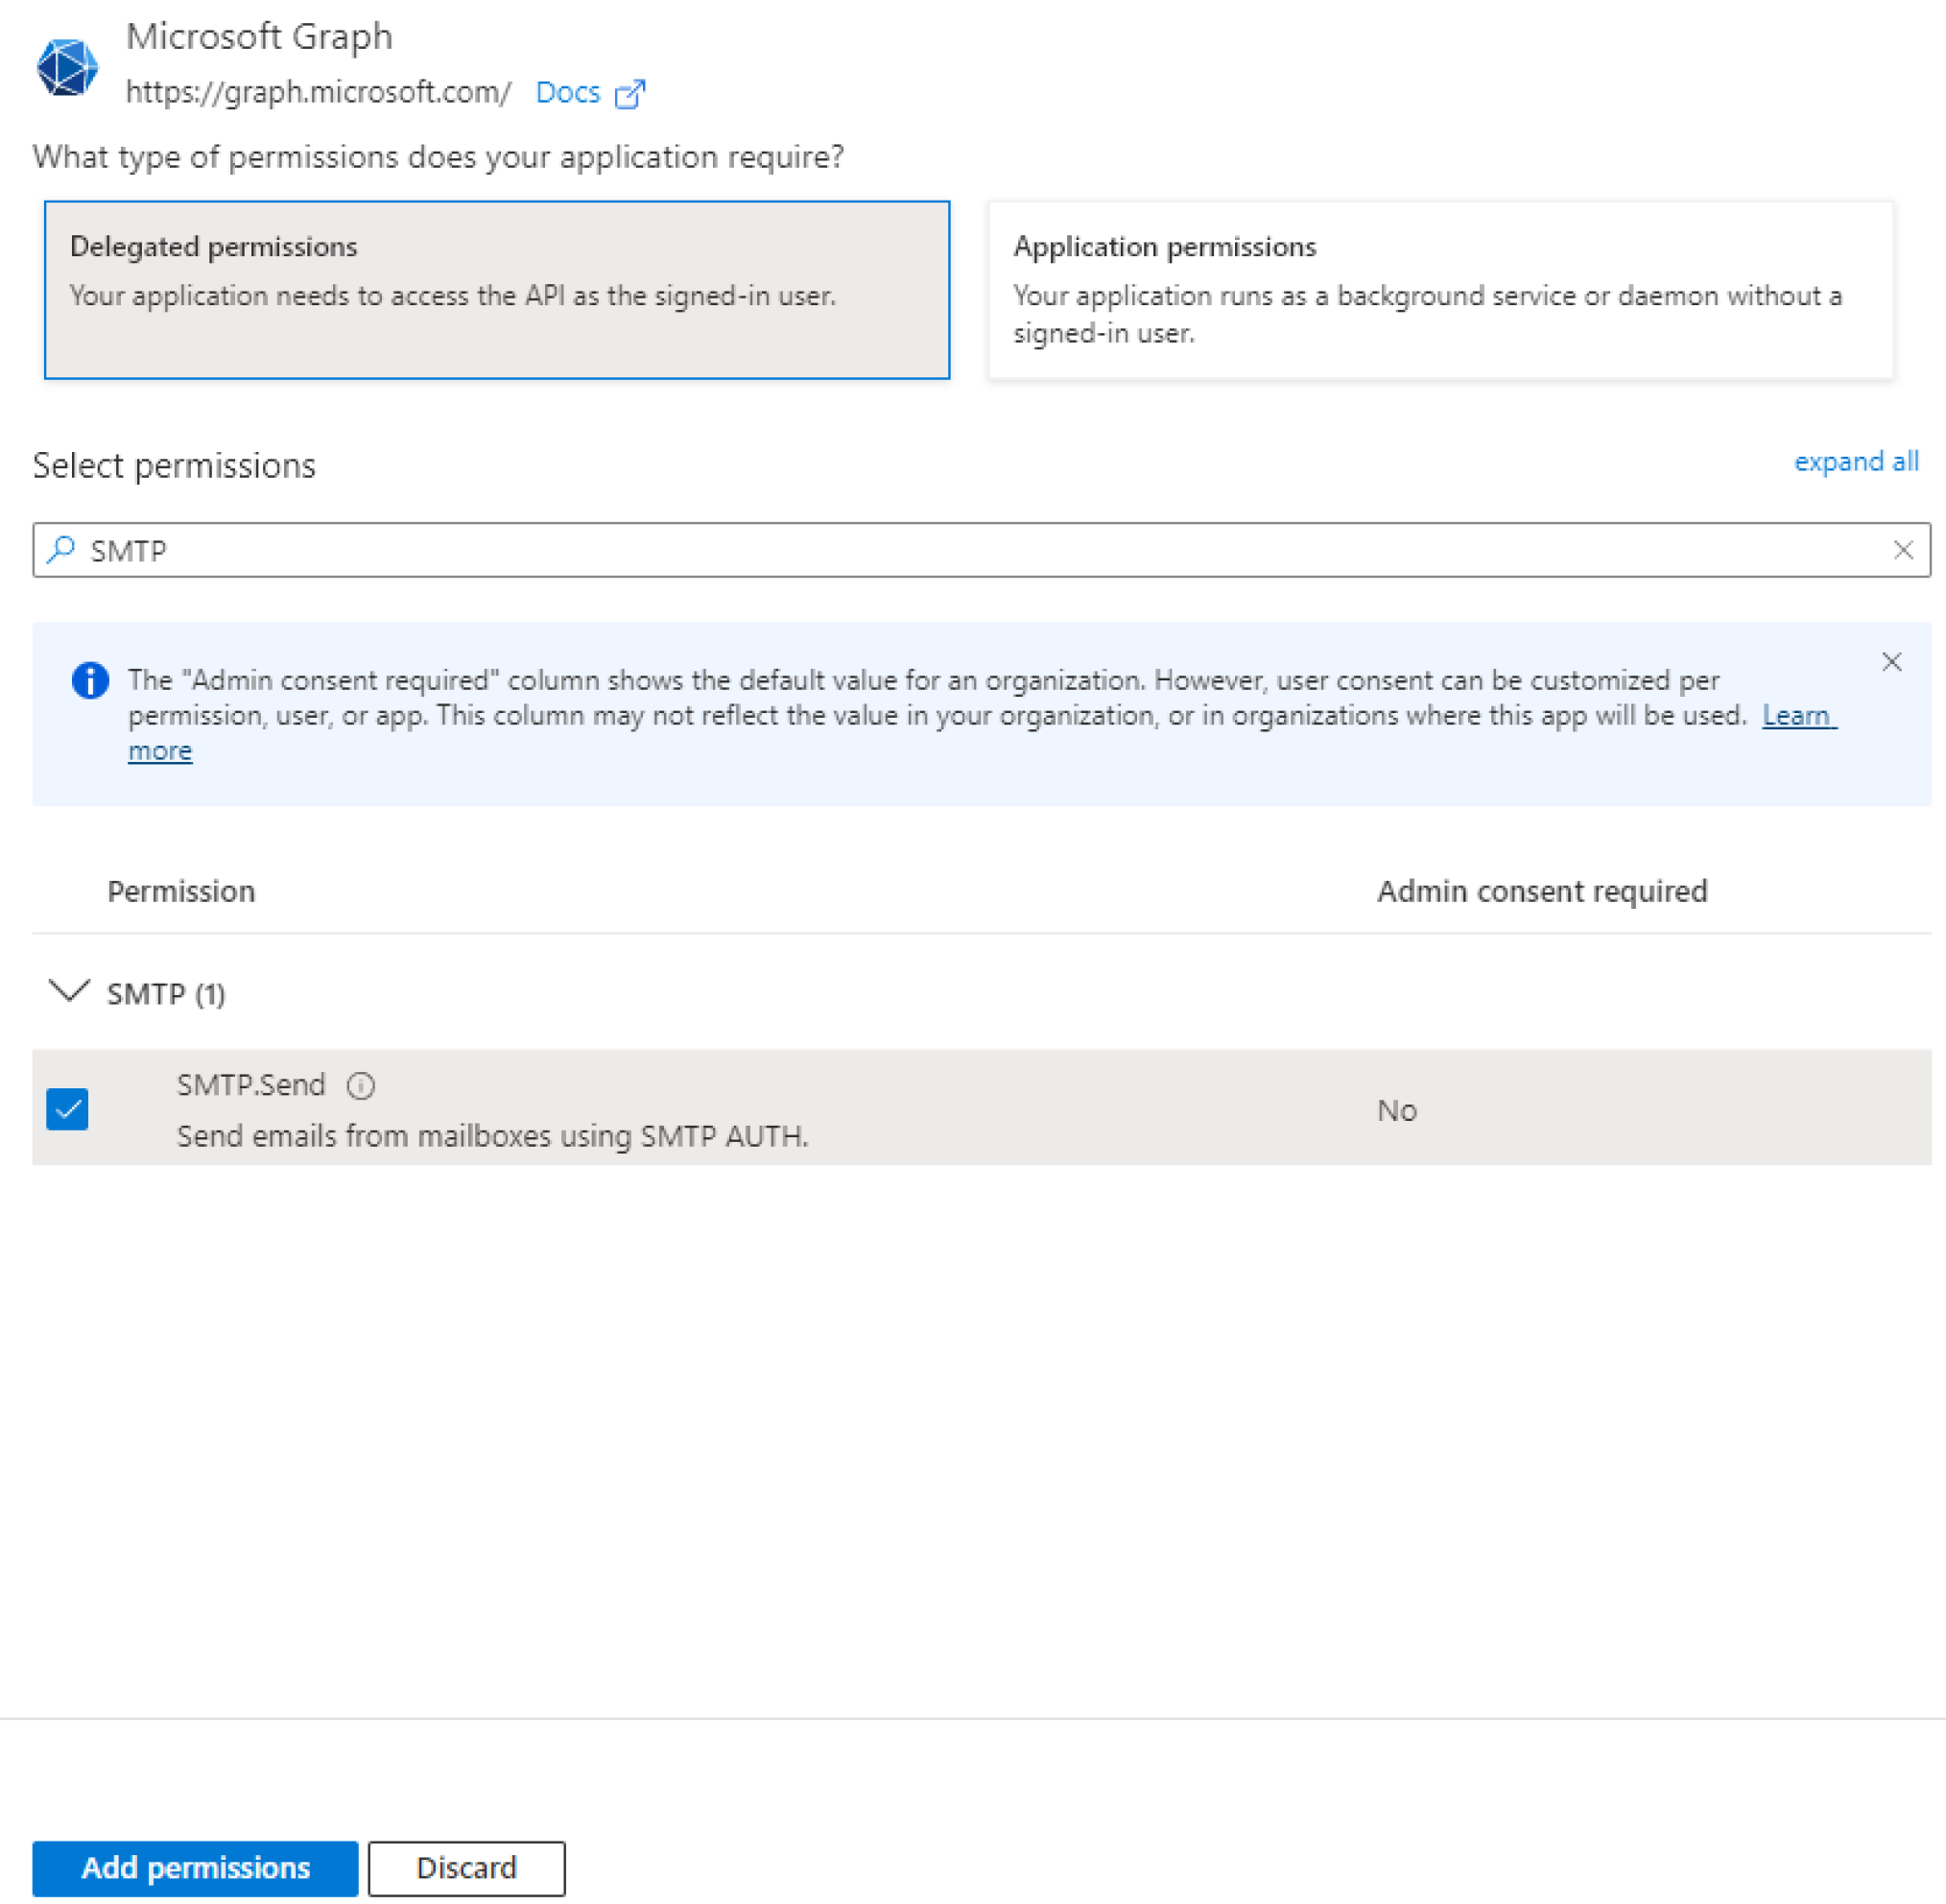
Choose Delegate permissions and using the search bar assign the following permissions:
- offline_access
- SMTP.Send
- User.Read
Confirm your choices with Add permissions.
Go back to the Request API permissions window and click on the APIs my organization uses tab.
Search for Office 365 Exchange Online.

Choose Application permissions and add permissions for
- IMAP.AccessAsApp
- POP.AccessAsApp
before once more confirming with Add permissions.
After all the API permissions have been added they still need to be approved by clicking on Grant admin consent.
If the option is grayed out on the screen your user account does not have sufficient permissions. Contact someone within your organization with an Azure Active Directory administrator account to complete this step.

3. Filling out activity parameters
All Wizlink Email activities contain an OAuth section.
Check the Use OAuth checkbox, set the Provider to Microsoft and fill out the Application ID and Tenant ID fields with data copied over from the newly created application.
Note that the Client Secret field should remain blank.
