Configuring Google OAuth for Wizlink
To use Google Authentification and log in to a Gmail account with Wizlink, you need to complete the following steps:
- Create a Google Cloud Application
- Input Application ID and Client Secret in Wizlink's email Activity
- Authorize Wizlink to use the current profile
1. Create a Google Cloud Application
Log in to https://console.cloud.google.com/ and open the current projects tab.

In the newly opened window create a new project by clicking on the New Project button.

In the new project's window fill in the Project Name, Organization and Location fields, then click on the Create button.
Organization and Location have to match the email account you want to use with Wizlink.
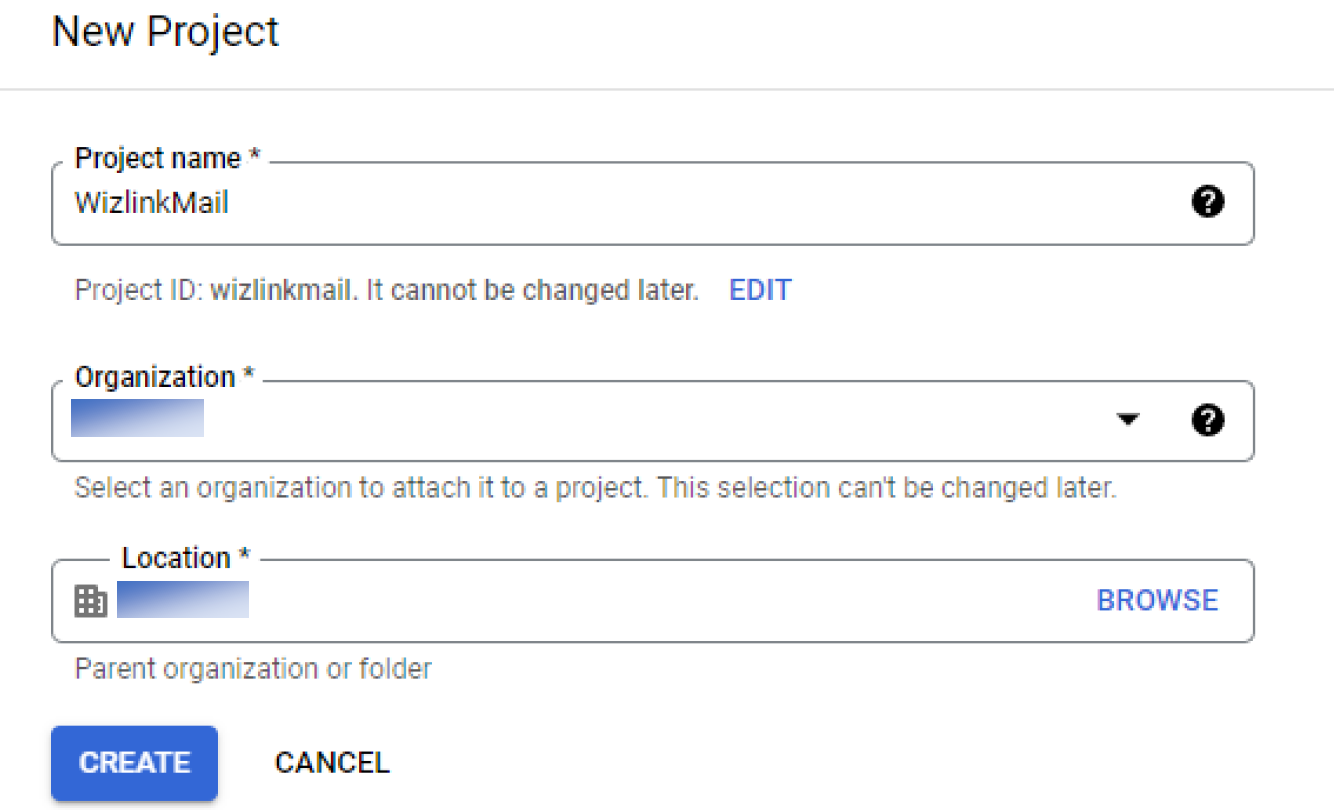
Choose the newly created project from the list of current projects to go to its main page. Choose the APIs & Services tab, usually located in the Quick access section.

(If the option is not visible, it can be accessed from the sidebar menu.)
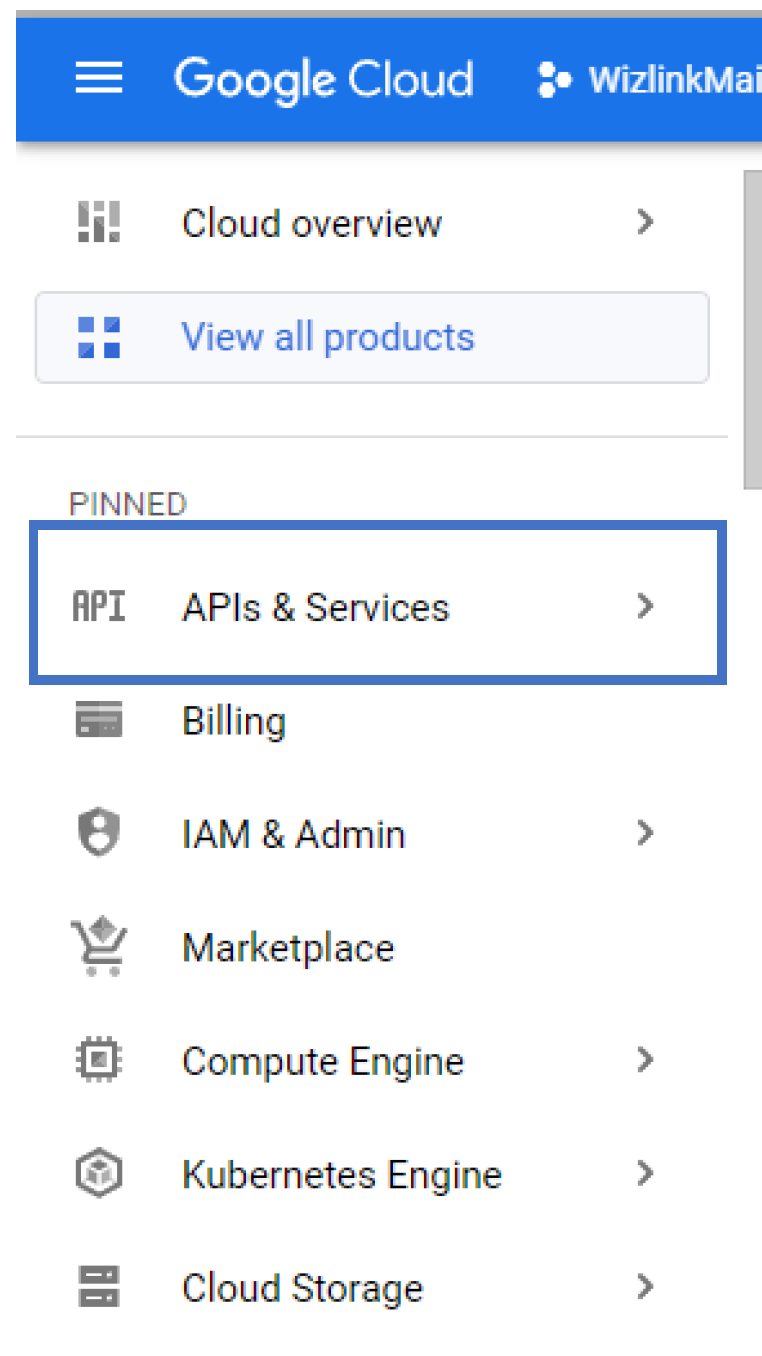
In the APIs & Services locate the OAuth consent screen and Credentials tabs.
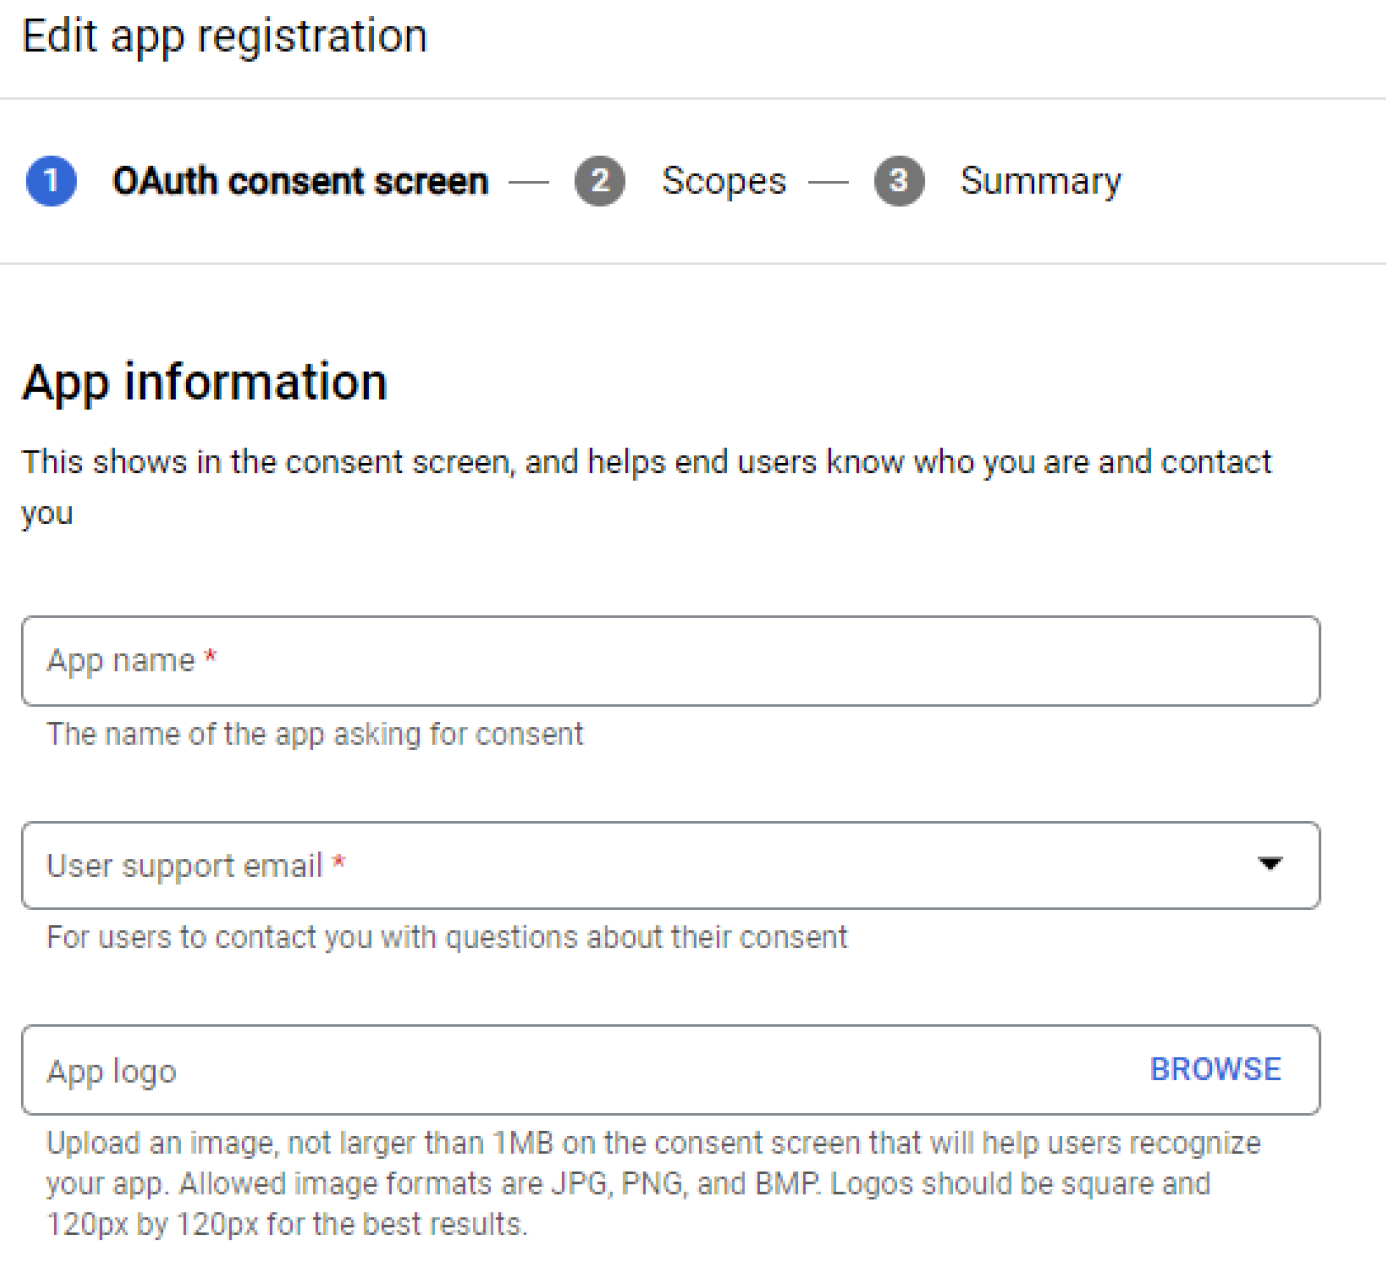
For OAuth consent screen choose Internal and click Create
Fill out the required fields (App name, User support email and Developer contact information) then confirm with Save and continue.
Do not add anything in Scopes, just confirm again.
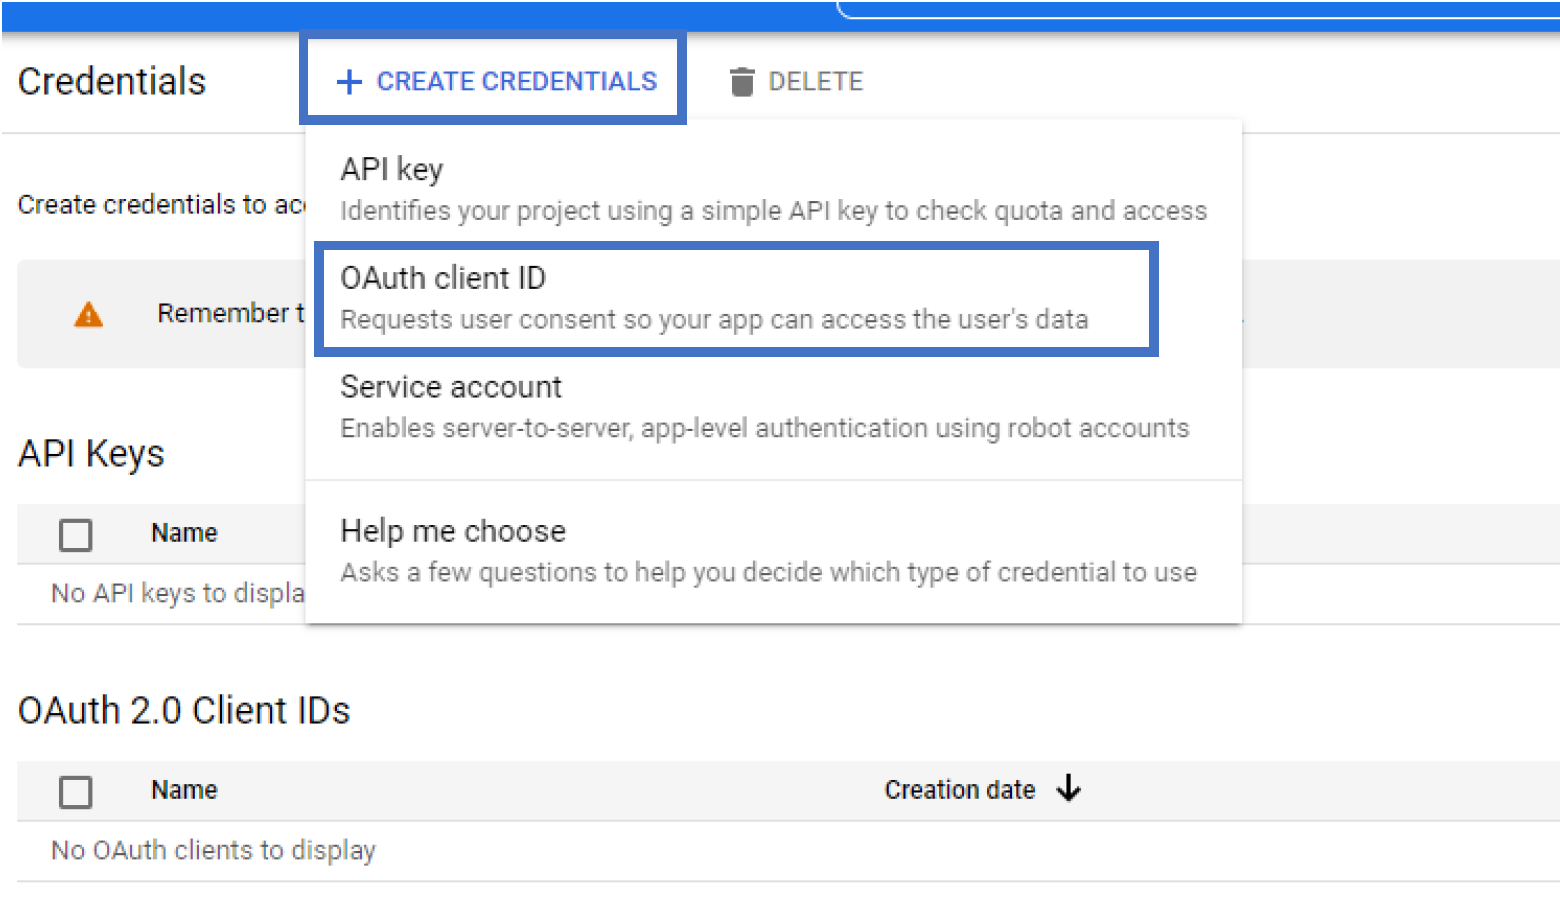
For Credentials add a new credential with Create credentials and choose the OAuth client ID option.
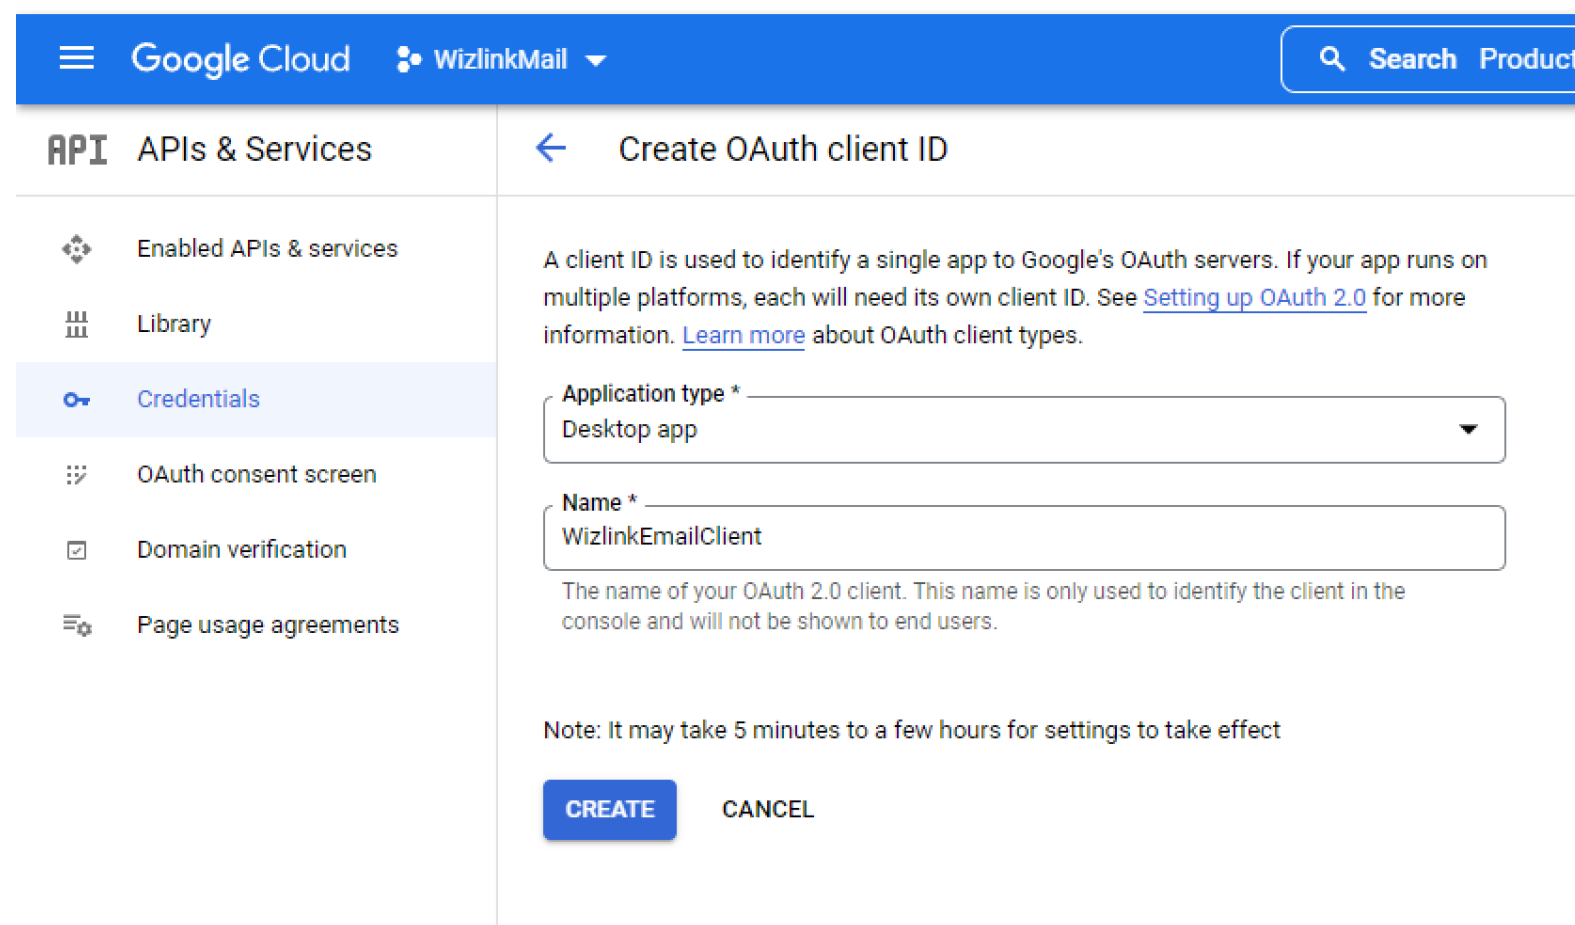
Fill out the Name field and specify Desktop app for Application type, then click Create.
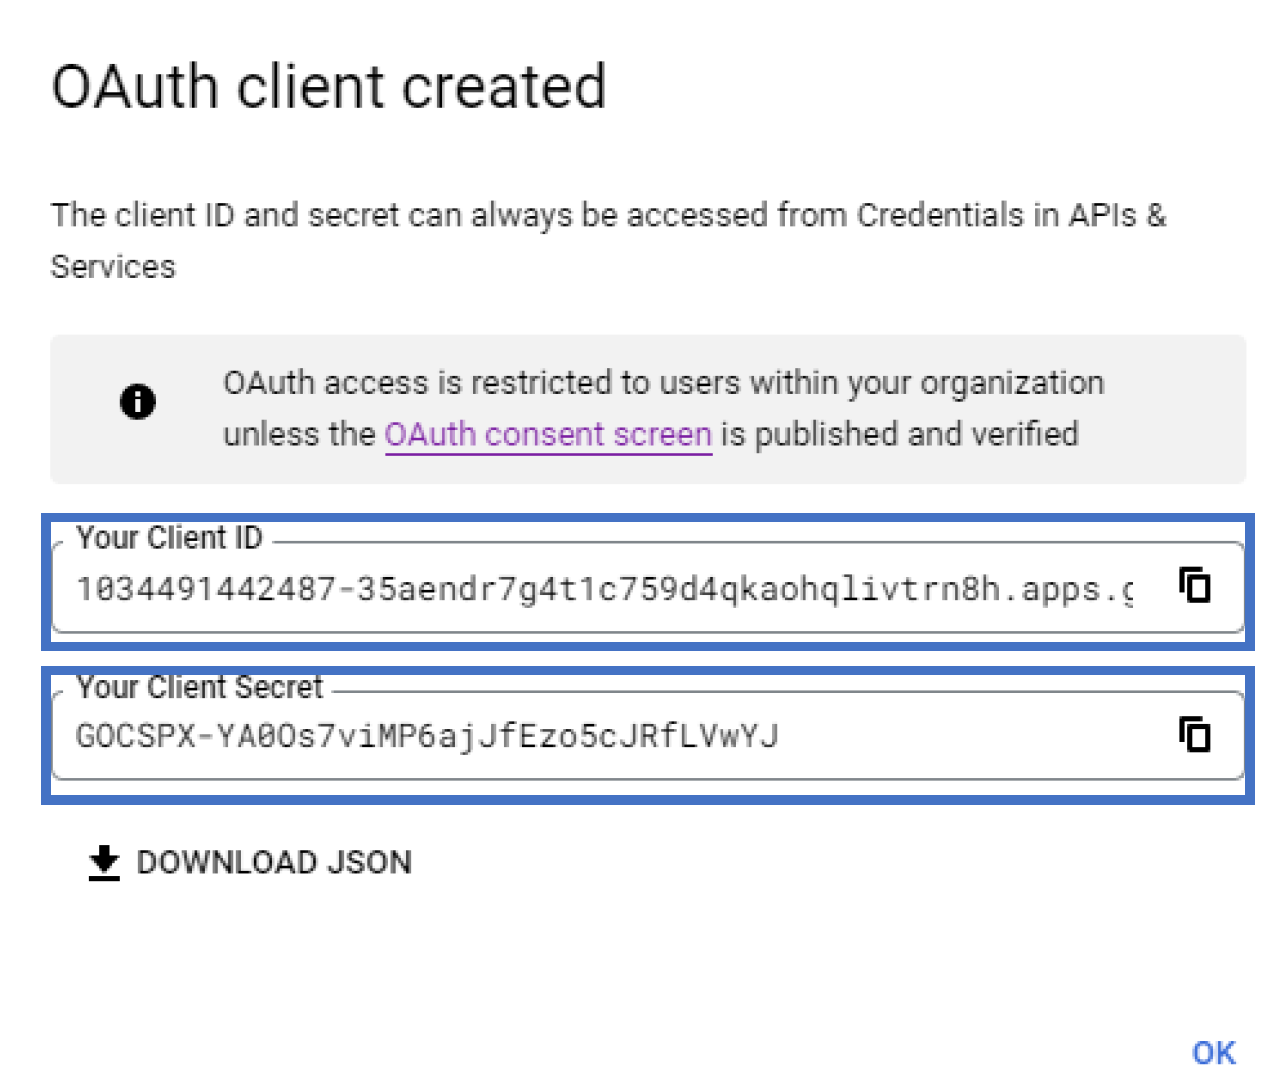
A window will appear with Client ID and Client Secret numbers. The values will need to be copied over to Wizlink activity.
2. Filling out activity parameters
All Wizlink Email activities contain an OAuth section.
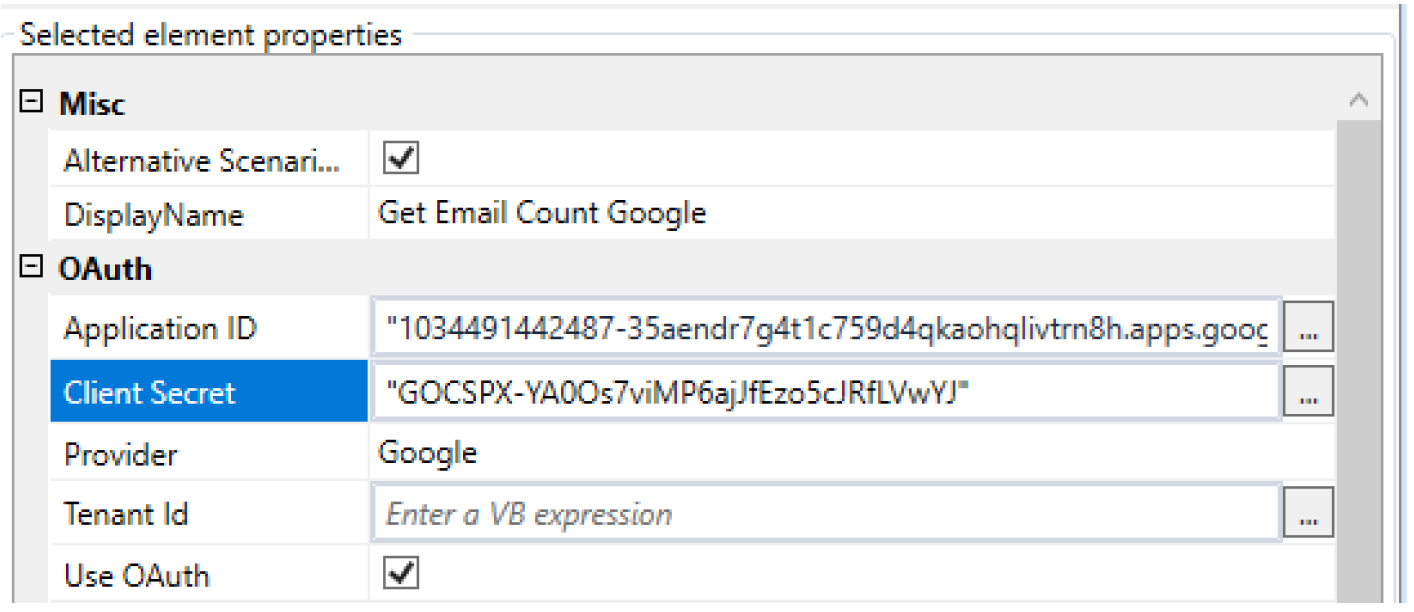
Check the Use OAuth checkbox, set the Provider to Google and fill out the Application (Client) ID and Client Secret fields with data copied over from the newly created application.
Note that the Tenant ID field should remain blank.
3. First-time authentication
The first time robot will attempt to log in to the email address, the operation will need to be authorized.
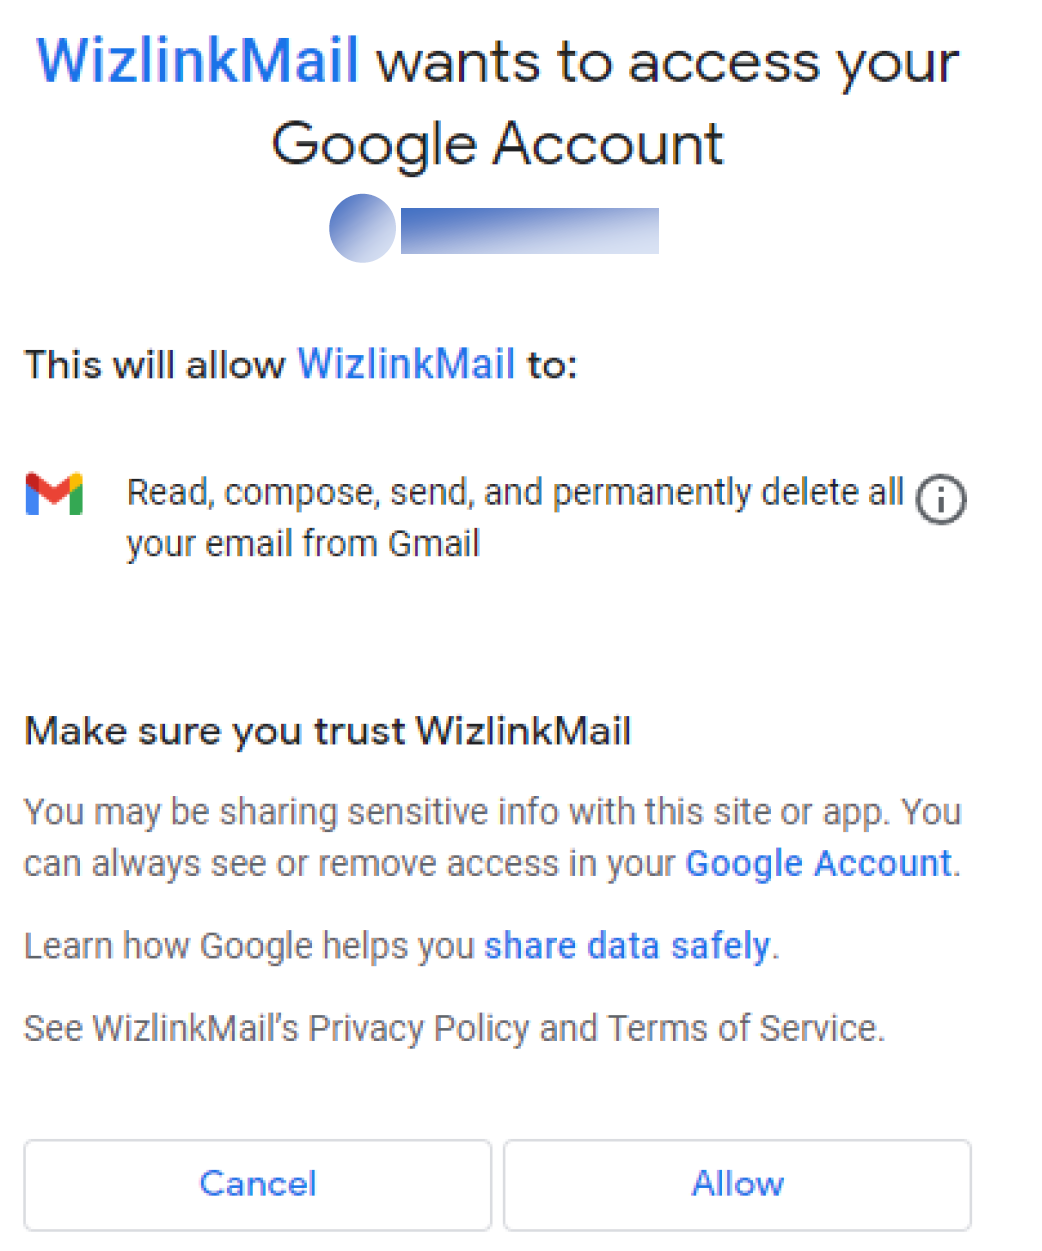
After the first log-in attempt a browser window will open asking for login and password. Log in to the Google account you want Wizlink to access and confirm the application is allowed to do that.
The process will need to be repeated for every email address the robot is to log in to.