Installation
1. Software requirements
1.1. System
-
- Minimum: Windows Server 2012 R2, Windows 7
- Recommended: Windows Server 2019 or later
1.2. Software
Depending on running mode (as a Windows service or under IIS control), different additional software components are required.
-
-
- .Net Runtime 8.x (or later) (for Windows Service)
- ASP.NET Core 8.x Hosting Bundle (for Internet Information Services)
-
Both can be downloaded from https://dotnet.microsoft.com/en-us/download/dotnet/8.0
1.3. Web browser
-
-
- Google Chrome 80 or later
- Firefox 72 or later
- Opera 66 or later
- Microsoft Edge 79 or later
- Safari 13 or later
- Internet Explorer - not supported
-
Browser needs to support JavaScript.
NOTE: By default, Firefox may not display resources from unsecured sources. Set up a certificate to use a secure connection, if you plan to use this browser.
2. Wizlink License Broker
2.1 Initial configuration and quick start
1. Unzip the Wizlink License Broker software files to a selected location on your hard drive.
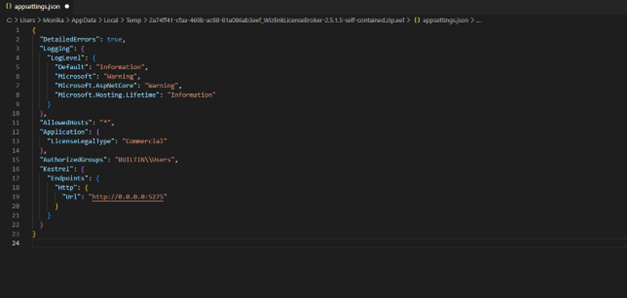
2. Open the configuration file named appsettings.json in a text editor
3. Complete the following sections:
a. AuthorizedGroups – allows Windows users belonging to specific groups to log in to the license panel, for example:
"AuthorizedGroups": ["Users"]
To add multiple groups use the following notation (with commas):
"AuthorizedGroups": ["BUILTIN\\Users", "group1", "group2"]
NOTE: "BUILTIN//Users" is a default local Windows group (as indicated by the prefix BUILTIN). The exact group name may vary depending on language, or version of Microsoft Windows OS installed. You can verify the name for your locale by checking, for example, which groups the currently logged-in user belongs to, using the
whoami /groups
command in CMD.
NOTE: As of version 2.5.1.10 prefix is no longer required and the group name does not have to be case-sensitive.
Groups can be added to and removed from AuthorizedGroups section without restarting the application.

b. LicenseLocation - folder storing the uploaded license files. By default set to "%programdata%/WizlinkLicenseBroker/Licenses"
c. Url – the IP address under which the service will be visible and which should be entered into Wizlink Designer and/or Runtime to allow the software to connect to licence server. By default this is set to http://0.0.0.0:5274 (or 5275, depending on version). We recommend choosing an alternate port and using http://[YOUR_IP_HERE]:[YOUR_PORT_NUMBER] instead.
NOTE: This section is only applicable when planning to run WLB as a Windows Service or locally in command line. IIS will impose its own url settings.
NOTE: For WLB to work properly, it may be necessary to enter the Windows firewall settings and open the chosen port for both incoming and outgoing traffic.
4. Save the changes to the appsettings.json file
5. Launch Terminal, PowerShell or Command Prompt (CMD) as Administrator and set the current path to the location of the WLB files.
6. Start the WLB server by running the WizlinkLicenseBroker.exe file
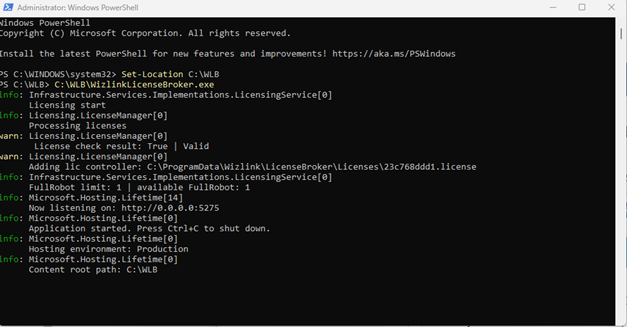
7. Log in to the management panel by entering the address http://[YOUR_IP_HERE]:[YOUR_PORT_NUMBER] in your web browser, followed by Windows credentials (for one of the accounts that are a part of previously Authorized Groups)
2.2. Windows Service
Creating a Windows Service
1. Copy the Wizlink License Broker files to the selected path (for example C:\WLB)
2. Run PowerShell with administrator privileges. Execute the PowerShell command – the command will create a Windows Service in the system:

New-Service -Name WLB -BinaryPathName "C:\WLB\WizlinkLicenseBroker.exe" -StartupType Automatic -Description "Wizlink License Broker"
Documentation of the New-Service command for PowerShell 7.2: https://learn.microsoft.com/en-us/powershell/module/microsoft.powershell.management/new-service?view=powershell-7.2
Starting the service
Run the Power Shell command - the command will start the Windows service:
Start-Service WLB
You can now log in to the Wizlink License Broker panel by entering the address http://[YOUR_IP_HERE]:[YOUR_PORT_NUMBER] in your web browser.
Removing the service
To remove the created service, first stop it using the Power Shell command
Stop-Service -Name "WLB"
And then remove it using the command
Remove-Service -Name "WLB"
2.3 IIS Manager (Internet Information Services)
Configuring Windows Features
To use the IIS Manager, first activate the service. To do this, go to Control Panel -> Programs -> Turn Windows Features On or Off and activate the IIS Management Console
• Internet Information Services -> Web Management Tools -> IIS Management Console
Enable Windows Authentication as well, if you want Wizlink License Broker to use it
• Internet Information Services -> Web Services -> Security -> Windows Authentication
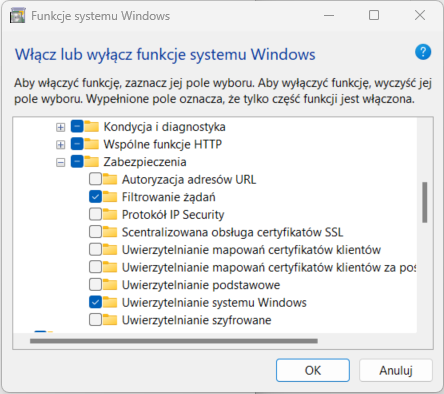
For the Wizlink License Broker to work correctly, it is also necessary to enable the Websocket Protocol
• Internet Information Services -> WWW Services -> Application Development Features -> WebSocket Protocol
User pool access configuration
Make sure that the user pool can manage its source folders.
1. For example folder C:\WLB to which the Wizlink License Broker files were unpacked and the default IIS pool: DefaultAppPool go to its Properties -> Security, then press Edit
2. In the next window, press Add
3. In the next window, enter IIS AppPool\DefaultAppPool as the object name, press Check names and confirm the changes
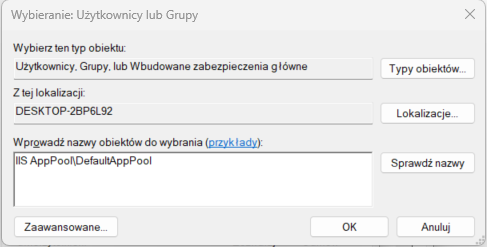
4. Give the added DefaultAppPool group full control over the source folder and commit the changes
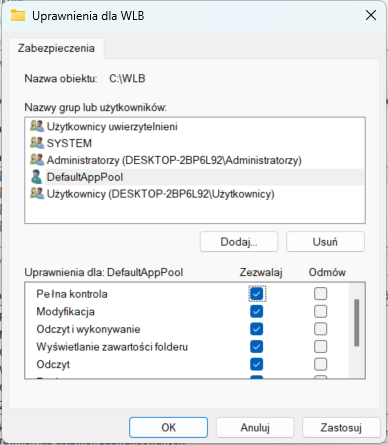
Creating an IIS service
1. Open the IIS Manager
2. In the left pane (‘Connections’) right-click on the server and select Add Web Site from the context menu
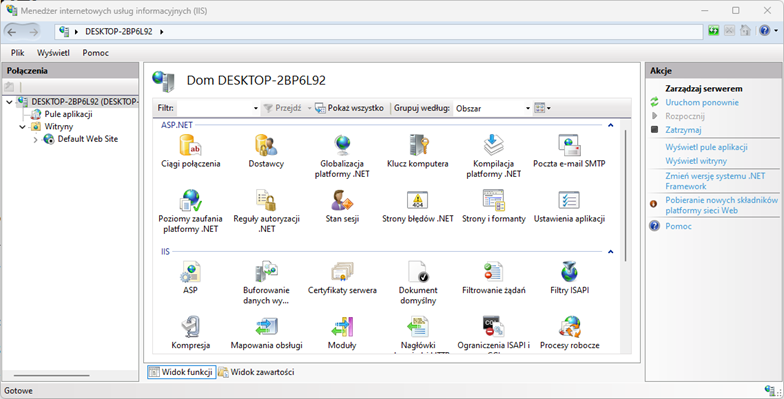
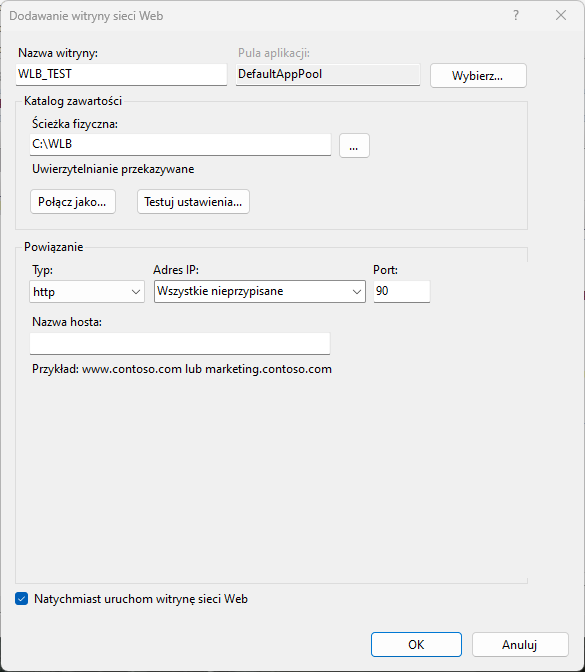
3. Complete the parameters of the site you are creating
Example:
Site Name: WLB_TEST
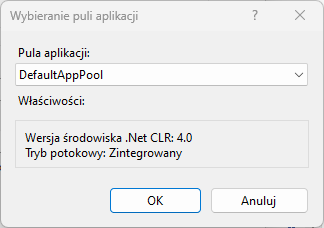
Application Pool: Select -> DefaultAppPools
Folder path (for Wizlink License Broker): C:\WLB
Association (protocol, addresses and port): (http / all unassigned / 90)
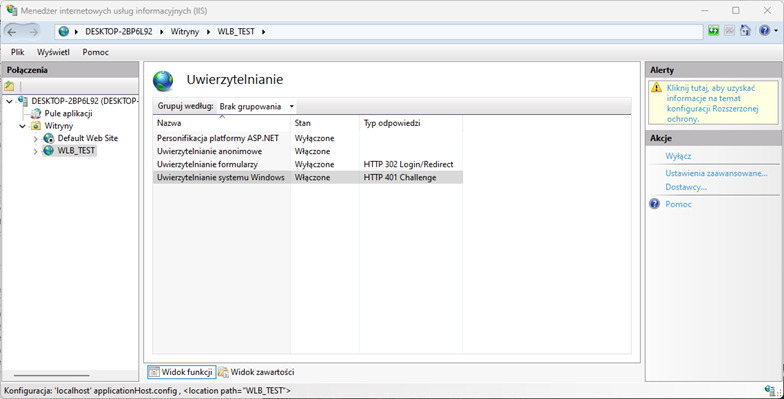
4. Make sure Windows Authentication is enabled for the site you've created.
To enable authentication for the site you've created, click on the site name in the left menu, select Authentication from the IIS group in the middle pane, and then make sure Windows Authentication is enabled.
5. Make sure that user profile loading is enabled for the application pool to which the Wizlink License Broker service is assigned.
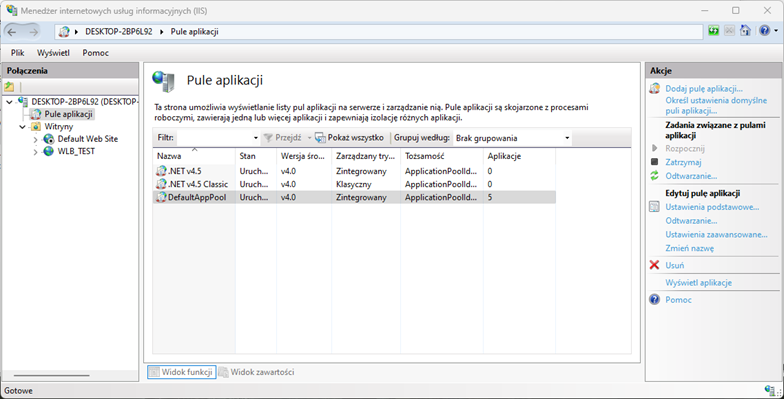
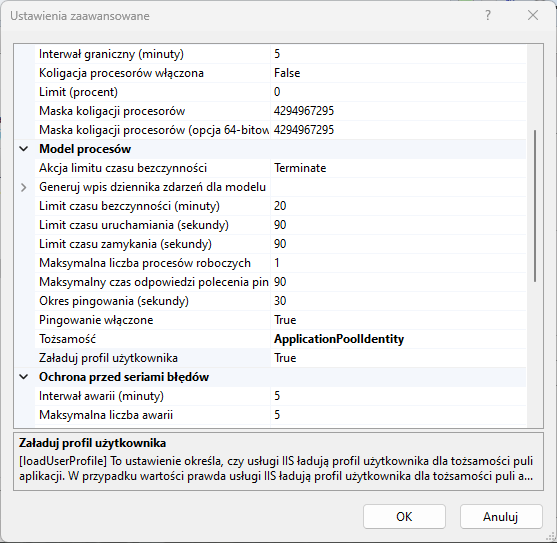
To enable user profile loading for the application pool, click Application Pools in the left panel, click again on the appropriate application pool, and then select Advanced Settings from the right panel. In the Process Model group, set the Load User Profile setting to True.
To make changes, confirm with the OK button and restart the application pool.
6. You can now log in to the Wizlink License Broker panel by entering http://[YOUR_IP_HERE]:[YOUR_PORT_NUMBER] in your web browser (example uses port 90)